Extensions (Beta)
💡 This page provides context and development guidance for Extensions. For installing and using Extensions please refer to the Extensions Manager section of the Advanced Usage page.
Context
One of the primary aims of BlueOS is to be a platform that is readily extendable to the needs of each user. For maximum utility it should be easy to add support for custom hardware, add components to the user interface, and share developments with other BlueOS users, without compromising the base BlueOS experience.
Accordingly, BlueOS has been designed with a containerised architecture, so the core functionality is kept separate from Extensions, and each can be distributed and updated independently of the other. The built in Extension system allows developers and users to find and install add-on software packages to BlueOS, and manage updates, permissions, and resource limits of those Extensions through the Extensions Manager.
Implementation
⚠️ The BlueOS Extensions system is currently still in a
betastage of development, so some implementation changes are expected in the near future.
The BlueOS Extensions system consists of three major components:
- Extension Packages, which are installable applications (Extensions) that run on the BlueOS computer, alongside BlueOS-core and BlueOS-bootstrap
- BlueOS Bazaar, an online web store that allows BlueOS users to find and install Extension Packages, and provides a standardised place for developers to offer Extensions through
- Anyone can see which Extensions are available, so (for example):
- Device manufacturers can show that their hardware is supported on BlueOS vehicles
- Users looking for hardware functionalities can find relevant device manufacturers
- Anyone can see which Extensions are available, so (for example):
- The Extensions Manager, a BlueOS-core service that's in charge of fetching Extension Packages from the Bazaar, as well as running active Extensions, and monitoring and limiting their resource usage and hardware access
💡 In future there will also be support for file-based Plugins, which will extend the functionality of a running Docker Container (e.g. themes or 3D models for BlueOS-core, or extra components and/or documentation for a particular Extension). These will also be shareable and installable through the Bazaar.
Components: Anatomy of an Extension

At heart, a BlueOS Extension is some functionality (optionally with a web interface) packaged into a Docker Image, and combined with some metadata that allows it to be found, shared, and managed. Extensions may interface with existing services provided by BlueOS (or other Extensions), and some Extensions may create persistent logs and/or make use of data or files provided by the user.
Once installed, an Extension Package can be run as a Docker Container, which normally occurs automatically when the vehicle turns on, but can also be manually disabled/enabled via the Extensions Manager. When running, Extensions can have custom permissions assigned, which can limit resource-usage and/or allow access to parts of the host computer's hardware.
Where Does the Code Run?
To integrate well within BlueOS, extensions typically include a backend service that runs on the onboard computer (in the vehicle), which provides some functionality, and is often accessed by a frontend interface that runs in the control station computer's browser.

A common usage process would follow:
- Vehicle turns on, BlueOS-bootstrap initiates BlueOS-core, backend service starts
- A user requests the extension's frontend interface, from the browser in their control station computer
- Extension backend serves a web interface to the browser
- User interacts with the interface, via some kind of input
- button clicks, text submissions, joystick events, etc.
- Frontend makes API calls to its backend service to facilitate the desired interaction(s)
- Backend receives an API call, processes it, and responds appropriately
- processing typically involves logging the request, accessing some hardware, calculating something, and/or requesting something from another service
- Frontend receives the response from the backend, and updates the interface accordingly
- the frontend may also do some processing, such as decoding an image to display to the user
- Repeat from step 4. until further interaction is no longer required
Backend Services
- Communicate with each other services (via APIs)
- Typically run continuously while the vehicle is on
- Have access to the vehicle computer hardware, including connected devices and the filesystem
- May have internet access, if the vehicle computer does
- May serve a graphical web-interface that's accessible via the frontend
- Extensions without a graphical interface could include device drivers and/or something with fully pre-determined functionality (that doesn't require user input)
Frontend Interfaces
- Only run when opened by a user
- Could be run by multiple users simultaneously, on separate devices that are on a shared network
- Can do some processing
- This can be useful to reduce the amount of data that needs to be sent from the vehicle to the control station computer (e.g. send an encoded image, which the frontend decodes and displays), or to offload some processing/calculations that would otherwise need to be done by the onboard computer
- Can communicate with their backend (via its API)
- It is also possible to communicate directly with other service APIs, but then the backend doesn't know about that interaction, which can make logging and debugging more challenging
- May have internet access, if the control station computer has it
- This can be useful for accessing cloud-based services, such as live-streaming, remote data storage/sharing, map downloading, etc.
- May work as a standalone application, if the functionality/logic is all in the frontend
- A HTTP server1 is still needed, to serve the frontend files for the static webpage
- Possible use-cases include calculators, image processing tools, documentation, etc.
You can use programs like simple-http-server to serve static files for an Extension.
How Does it Get There?

Every Extension has a backend, whereby:
- A Dockerfile is used to create a Docker Image of a program / the onboard functionality
- The Image gets uploaded to a Docker Repository, and (optionally) published on the BlueOS Bazaar
- BlueOS installs the Image (via Bazaar, or manually), and runs it as a Docker Container
- BlueOS monitors and restricts resources, and restarts Extensions that fail unexpectedly
Frontend interfaces are optional, but well-supported:
- Some device drivers and the like require no/minimal configuration, so may not require a frontend
- Services that provide a frontend can be automatically detected by BlueOS for convenience
Metadata (Dockerfile)
The process of packaging a set of programs and files into a Docker Image requires a Dockerfile, which can be thought of as recipe for building the Image.
For an Extension to be properly managed and shareable, the Dockerfile it's created from should include relevant metadata2 via the following labels:
LABEL permissions='{}'- This can be used to set resource limits, including allowing access to specific components of the underlying hardware
- This must be a valid JSON (use \ to break lines), which follows the configuration described in the Docker Api
- For reference, existing permissions can be retrieved from a running Docker Container by running the command
docker inspect <container_name>- Do not copy the whole output to use in your Extension - only the minimal requirements for the Extension to work
- Common uses of the
permissionslabel include:- Mapping/mounting a folder from the host device into the running Container, so the extension can store persistent files
- Useful for storing logs, configuration files, and recorded data
"HostConfig": {\ "Binds":[\ "/usr/blueos/extensions/data-logger:/app",\ ]\ } - Allowing the Container to access connected serial devices / hardware (at
/dev/tty*)"HostConfig": {\ "Privileged": true,\ "Binds":[\ "/usr/blueos/extensions/data-logger:/app",\ "/dev:/dev"\ ]\ } - Automatically mapping port 80 of the Container to a free port in the host, and creating an explicit network bridge to the vehicle's network
- Requires using
host.docker.internal(i.e. instead oflocalhost/127.0.0.1) to access BlueOS APIs from inside the Extension, because the Extension is not sharing the BlueOS-core network
LABEL permissions='\ {\ "ExposedPorts": {\ "80/tcp": {}\ },\ "HostConfig": {\ "ExtraHosts": ["host.docker.internal:host-gateway"],\ "PortBindings": {\ "80/tcp": [\ {\ "HostPort": ""\ }\ ]\ }\ }\ }' - Requires using
- Constraining CPU/memory usage (half a core)
- This is important if your Extension is CPU or memory-hungry, as we need to ensure it doesn't affect the autopilot's operation
{
  "HostConfig":{
    "CpuPeriod":100000,
    "CpuQuota":20000,
    "Memory":209715200,
  }
}
- Mapping/mounting a folder from the host device into the running Container, so the extension can store persistent files
- Our Extensions Examples Repository has some useful examples
LABEL version="1.0.0"- Public Extension releases should use a SemVer-compliant version
- We recommend using alpha/beta versions for non-stable (development) releases (e.g.
1.0.1-beta.16)
LABEL authors- The individual author(s) who have developed the Extension
- Useful for giving credit, and as a potential support backup
- This should be a list of JSON dicts, each containing a "name" and "email" key with corresponding values
LABEL authors='[\
    {\
        "name": "Me",\
        "email": "me@email.com"\
    },\
    {\
        "name": "Me Too",\
        "email": "me2@email.com"\
    }\
]'
LABEL company(becomingmaintainer)- The person or company responsible for maintaining the Extension
- JSON object in the form
{
    "about": "brief description",
    "name": "Company/Person Name",
    "email": "email@company.com"
}
LABEL readme- A URL pointing to a markdown-based README file
- Allows using
{tag}to find versioned readme files without manually updating the URLs - e.g.
"https://https://raw.githubusercontent.com/BlueOS-Community/BlueOS-examples/{tag}/example4-vue-backend/Readme.md"
- Allows using
- A URL pointing to a markdown-based README file
LABEL links- An arbitrary collection of relevant links, in a JSON dict
- Recommended link type examples include
{
    "website": "https://...",
    "github": "https://github.com/...",
    "support": "mailto:support@company.com",
    "documentation": "https://docs.company.com/cool-extension/",
    "phone": "tel:+1234567890"
}
LABEL requirements- SemVer-compliant dependency requirements for this Extension to work correctly (with BlueOS and/or other Extensions)
- format not yet finalised
- will likely be something like
repo/extension-name >= version
- will likely be something like
LABEL type- Useful for broad-strokes filtering when searching for/browsing Extensions
- Not yet implemented in the Extensions Manager
- Should be one of the following strings:
"device-integration""other""tool""example"(for Extension examples)
LABEL tags- Useful for finer-grained filtering to help find relevant Extensions
- Not yet implemented in the Extensions Manager
- Must be alpha-numeric (no capital letters, no symbols except dashes)
- Limited to 10 tags per extension
- Some examples (focused around possible Extension functions):
"positioning""navigation""mapping""data-collection"(e.g. scientific sensor integrations)"communication"(e.g. integration of an acoustic modem)"interaction"(e.g. integration of a gripper / robot arm / brush)
The metadata from the Docker labels is used to populate the Repository Manifest, which is used to include Extensions in the Extensions Manager.
Web Interface (HTTP Server)
If the Extension needs a visual interface3, the recommended approach is to provide a webpage that's accessible via the existing BlueOS web interface.
To do so requires the Extension to run a HTTP server1, at which it must serve a register_service endpoint in the format of a JSON dict with the following keys:
"name"- This gets displayed in the sidebar
- A sanitised (lowercase, alphanumeric) form is used to create a named URL for convenient access
- e.g.
My Software 9000!->http://blueos.local/extension/mysoftware9000
- e.g.
"description""icon"- Specify Material Design Icons in the form
"mdi-icon-name"(e.g."mdi-lightbulb") - Define custom SVG icons as an SVG element
(New in 1.2)- e.g.
"<svg role=\"img\" viewBox=\"0 0 24 24\" xmlns=\"http://www.w3.org/2000/svg\">...</svg>"
- e.g.
- Specify Material Design Icons in the form
"company"- The name of the company/person in charge of maintaining the Extension
"version"- The SemVer-compliant version of the API that is accessible through the Extension's HTTP server
- Not required to match the version of the Extension itself
- e.g. the Extension may release a version with a new appearance, with no changes to the API/functionality
- May be used in dependency requirement checks
"webpage"- The official URL for the extension
"api"- The official URL for the extension's API
"new_page"(optional)- Boolean (
true/false) specifying whether to open the extension in a new page instead of in a BlueOS frame
- Boolean (
As an example:
{
    "name": "BlinkLED",
    "description": "An intuitive application that blinks a LED.",
    "icon": "mdi-led-on",
    "company": "Lights End Darkness",
    "version": "1.0.1",
    "new_page": false,
    "webpage": "https://github.com/octocat/blink-led-BlueOS-extension",
    "api": "https://github.com/octocat/blink-led-BlueOS-extension/wiki/api"
}
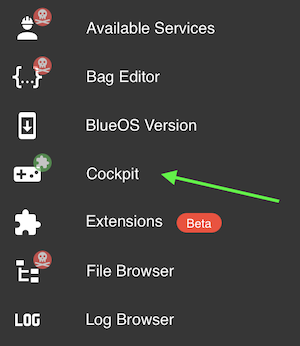
Each Extension service with a register_service endpoint will have an entry in the BlueOS web interface sidebar menu:
You can choose to not provide a web interface if your extension operates with no user input. The VirtualHere Extension is a relevant example.
Functionality
Different types of Extensions have different functionality, and there are often a variety of tools available to provide that. When starting to develop extensions, we would generally recommend:
- Python to run stuff
- Frequently using a web framework like Litestar/Flask/FastAPI to provide the backend of an interface
- Static HTML files to contain and display parts of an interface
- Our Extensions Examples Repository has some useful examples
Examples: What do they Look like?
Device Integrations
Examples
Other
- VirtualHere
- USB over IP: used to present USB devices connected to the Onboard Computer as though they are plugged in to the Control Station Computer
- ZeroTier
- Network extension/sharing: used to create a virtual private network that allows managing and controlling a vehicle remotely over the internet
Where do they Live?
Online Packages
- Extension Packages are expected to be hosted on Docker Hub
- To appear on the Extensions Manager store they must be registered in the BlueOS Extensions Repository
- Extensions are added to the store by opening a Pull Request (PR) against the repository, including a
metadata.jsonfile and an icon - Once the PR is merged, a continuous-integration job will automatically use the information from the provided metadata file to access Docker Hub and fetch the labels for all tags that are SemVer-compliant
- The fetched information is then compiled and published to the Manifest file in the
gh-pagesbranch
- Extensions are added to the store by opening a Pull Request (PR) against the repository, including a
Installed Extensions
Once installed on the Onboard Computer, Extensions are stored at /var/lib/docker in the file-system, but should be managed through the BlueOS Extensions Manager.
Ecosystem Attributes
Current Extensions Manager Features
- Install Extensions from store
- Runs installed Extensions on startup
- Track CPU and memory usage (per Extension)
- Manage/edit permissions (including limiting hardware resource access/usage)
- View Extension logs
- Disable Extensions
- Uninstall Extensions that are no longer wanted
- Manually update/rollback Extensions (select version)
- Create a custom Extension configuration
- Allow restarting Extensions
Planned Extensions Manager Features
- Notify users of available updates
- Support userdata file cleanup from Extensions (checks for dependencies)
- Improve permissions interface (to show what's available/requested)
- See more / track progress in the Kraken development tracker
Development Process
Expected Development Cycle
- (If possible) create and test initial backend functionality within BlueOS
- Wrap Extension functionality into a Docker Image
- Upload to Docker Hub
- Test locally (using a "manual"/development install)
- Submit the extension to the Bazaar
- Get it accepted
- Install it from the store
- Test locally
- Make improvements
- Upload a new version
- Repeat from step 6.
Initial Backend Functionality Implementation/Testing
If you're starting your Extension from scratch, there are a variety of development tools available within BlueOS and in existing Extensions which can enable implementing and testing your key functionality before you start to package it up for easy installation and sharing. Having the backend functionality tested before trying to package it into an Extension can help to minimise unexpected issues and troubleshooting.
Basic functionality can be tested from within the core BlueOS Docker container using the provided Terminal, and if you store files that you create in the /usr/blueos/userdata/ directory they will be persistent across BlueOS restarts, and accessible through the File Browser. For a more interactive development experience, you may wish to use an Extension like Jupyter or VS Code.
Extension Creation and Docker Image Upload
Extensions are Docker images, so the packaging process involves
- Creating a Dockerfile describing what you would like to package and how it should execute, then
- Using it to build one or more Docker Images for the hardware architectures you wish to support, then
- Uploading those images to an online Docker hub/repository, so the Extension can be downloaded and installed on BlueOS devices
- Offline/local installs are currently not supported, so this is currently required for BlueOS to be able to find and manage your Extension(s)
Depending on your starting points and preferred development process/environment, the building and uploading parts can either be performed automatically as part of a CI/CD pipeline, or locally on your development machine. We recommend trying out a QuickStart GitHub repository to familiarise yourself with the process, then deciding how you would like to perform your own development from there.
QuickStart
QuickStart repositories serve as a way to get an example Extension up and running as quickly as possible, while also forming a solid basis for continued development of your own Extension functionalities from that point.
- Create a GitHub account and a Docker Hub account
- "
Use this template" from the top right of a QuickStart GitHub repository - Create a Docker repository, to host your Docker images for this Extension
- The name should be something like
blueos-extension-image-name(e.g.blueos-quickstart)
- The name should be something like
- Set up GitHub Secrets:
DOCKER_USERNAME: your Docker Hub usernameDOCKER_PASSWORD: a Docker Hub access token (Read & Write), to allow your GitHub repository actions to upload Docker images to your Docker Hub account
- Set up GitHub Variables:
IMAGE_NAME: the name you chose for your Docker repositoryMY_EMAIL: the developer's email addressMY_NAME: the developer's nameORG_EMAIL: a support email for the maintaining organisationORG_NAME: the name of the maintaining organisation
- Run the deployment workflow4 to automatically build and upload your Docker image (refresh the page to see its status):

- Once the action completes (it may take ~5 minutes) confirm the image is available in your Docker repository
- If you have a BlueOS device available, try manually installing the extension
The QuickStart repositories make use of our BlueOS Extension Deployment Action, which is available for use in any GitHub workflow, in case you would prefer to use a custom one.
Offline Building
While we generally recommend automated builds for convenience and consistency, it is also possible to develop, build, and upload Docker images directly from your development computer.
We recommend using buildx for cross-platform building, and qemu for emulating arm/v7 on x86-based developer hardware. Our deployment action provides our best-practice steps for Extension packaging, so is a useful starting point.
There is also a basic extension template for Extensions that are intended to be built manually.
⚠️ Each supported hardware architecture requires its own Docker Image to be built, which our deployment action helps with.
Multi-hardware support allows your Extension to be run/tested on different hardware, but can make development and maintenance more challenging. In particular, different hardwares have different build requirements, which may have different library compatibilities.
For reference:
- Raspberry Pi ≤3 boards use the
arm/v7architecture - Raspberry Pi ≥4 boards use the
arm64/v8architecture, but can typically also runarm/v7images and software
Manual/Development Installs
Testing each Extension release before making it available to install from the online store is strongly recommended.
- Go to the Extensions Manager in BlueOS
- Click on the "Installed" tab
- Click the "+" icon in the bottom right corner
- Enter the relevant information for your Docker Image, so it can be fetched from Docker Hub
Extension Identifier:dockerusername.base-extension-name- e.g.
esalexander.quickstart - Used for uniqueness comparisons with other installed Extensions
- e.g.
Extension Name: A human-readable name for the Extension- e.g.
QuickStart Test
- e.g.
Docker image:dockerusername/extension-name- e.g.
esalexander/blueos-quickstart - Used for finding and downloading the Docker image
- e.g.
Docker tag: the branch or tag/version the image was generated from- e.g.
main - Used for finding and downloading the Docker image
- e.g.
Custom settings: the contents of your Dockerfile'spermissionsLABEL, but with relevant variable substitutions (e.g.$IMAGE_NAME→blueos-quickstart) and without the backslash line continuation characters- Used for configuration of the Docker container when it's run
Submission to the Bazaar
- Check metadata docs, and match the requirements with your Dockerfile
- Build, and upload a SemVer-compliant Docker Image to Docker Hub
- Submit a Pull Request (PR) to the extensions repo
- Include an icon, and a user-friendly description
- A nicer form-based interface is on the way, but not yet available
Getting Your Extension Accepted
- Check for build errors in the Docker Image creation process
- Respond to PR feedback (if there is any)
- Blue Robotics will merge the PR, after which it becomes public
- Available extensions are visible in the BlueOS extensions manager, as well as in the gallery
- BlueOS Bazaar will provide a filterable and searchable interface for this
Installing from the Bazaar
The Bazaar is available through the BlueOS Extensions Manager. Once an Extension has been accepted into the Bazaar it should appear automatically, within a few minutes.
Iterating / Release Cycle
Most programming projects are never fully "complete", so it is expected that Extensions will be modified and improved over time. Extension approval only needs to occur when the Extension is first added to the store, so updated releases should become available within 24 hours from when the new version is uploaded to Docker Hub.
The expected iteration process is:
- Make improvements
- Build the updated Docker Images and upload them to Docker Hub
- Should be tagged with a SemVer compliant tag that’s higher than the previous release
- E.g. v1.0.0 → v1.0.1
- Should be tagged with a SemVer compliant tag that’s higher than the previous release
- Confirm the new version is available through the BlueOS Extensions Manager
- Install and test it