Advanced Usage
Display Breakdown

Header Bar
The header bar consists of the following main elements:
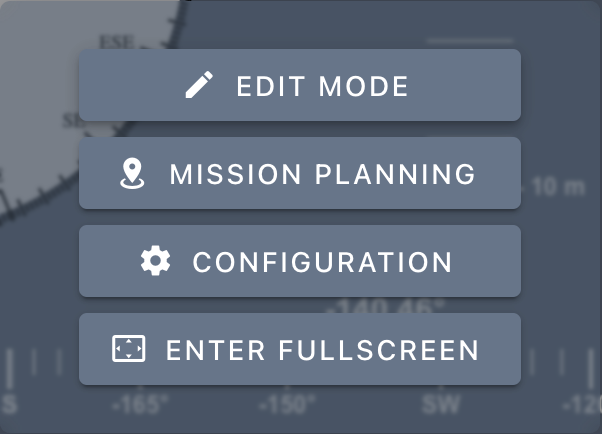
Burger Menu
Clicking on the burger menu (in the top left of the screen) provides access to various configuration options:
Mission Name
It is possible to set a display name for the current mission/operation from beside the burger menu. If the name is deleted it can be made available again by visiting the Mission Planning page.
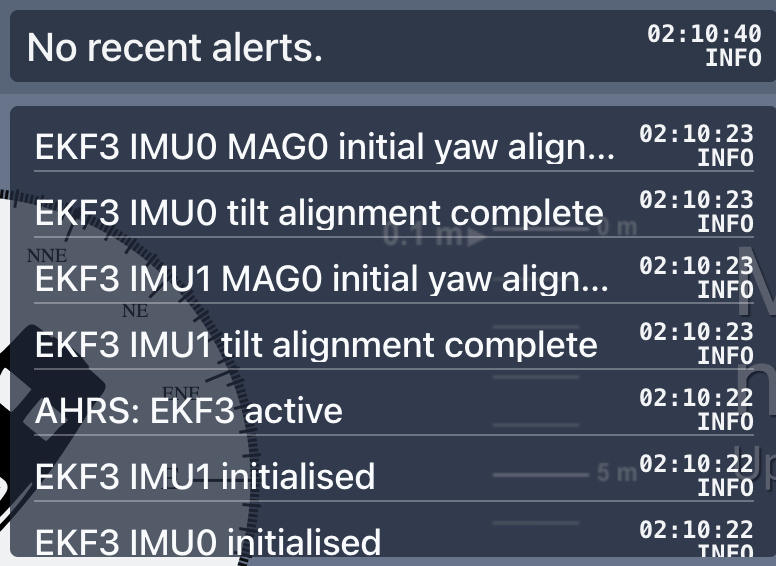
Alerts
Alerts received from the autopilot (STATUSTEXT), as
well as application notifications (like loss of connection to the vehicle) are displayed in the central alerts
pane, which can be hovered over to access a scrollable history of alerts:
Some alerts can be read aloud on arrival using text to speech technology, which can be configured.
Mini Widget Container
When space is available, mini widgets can be placed on the right side of the alerts display.
Date
The current time and date is displayed in the top right corner.
Edit Mode
Cockpit's interface consists of a configurable widget system, with
- Profiles
- for supporting different operators and/or vehicle types
- can be added/removed, saved and loaded, and switched between in edit mode
- Views (within each profile)
- for handling different operation modes / targets within a mission
- can be added/removed, saved and loaded, and dynamically switched between
- Widgets (within each view)
- for advanced information display and vehicle control
- can be added/removed, placed in arbitrary locations, and resized
- Mini-widgets (within mini-widget bar widgets)
- for basic information display and vehicle/interface control
- can be added/removed, reordered within widget bars, and moved between them
Profiles
A "profile" is a collection of views that are relevant to a particular use-case or operator.
If one control station computer is used by multiple operators (e.g. within the same organisation) at different times then it could be useful for each operator to have their preferred interface saved on that computer, and they can switch to their profile when they open up Cockpit.
Alternatively, if the same control station computer is used to control different types of vehicles (e.g. a boat, an underwater ROV, and a drone) then the operator can load the appropriate vehicle control interface when they connect to a different vehicle type. It will soon be possible to store and load profiles from the vehicle itself, instead of only on the control station computer, which makes it easier to connect a different control computer to a vehicle and load the familiar control profiles for that vehicle.
Default Profiles
Cockpit includes default profiles for submarine and boat use-cases, which cannot be edited. These serve as a reference for a recommended base profile, and are useful for restoring to a known reasonable interface in case something goes wrong with custom interface options. The default profiles are not persistent, so they may change through different Cockpit versions.
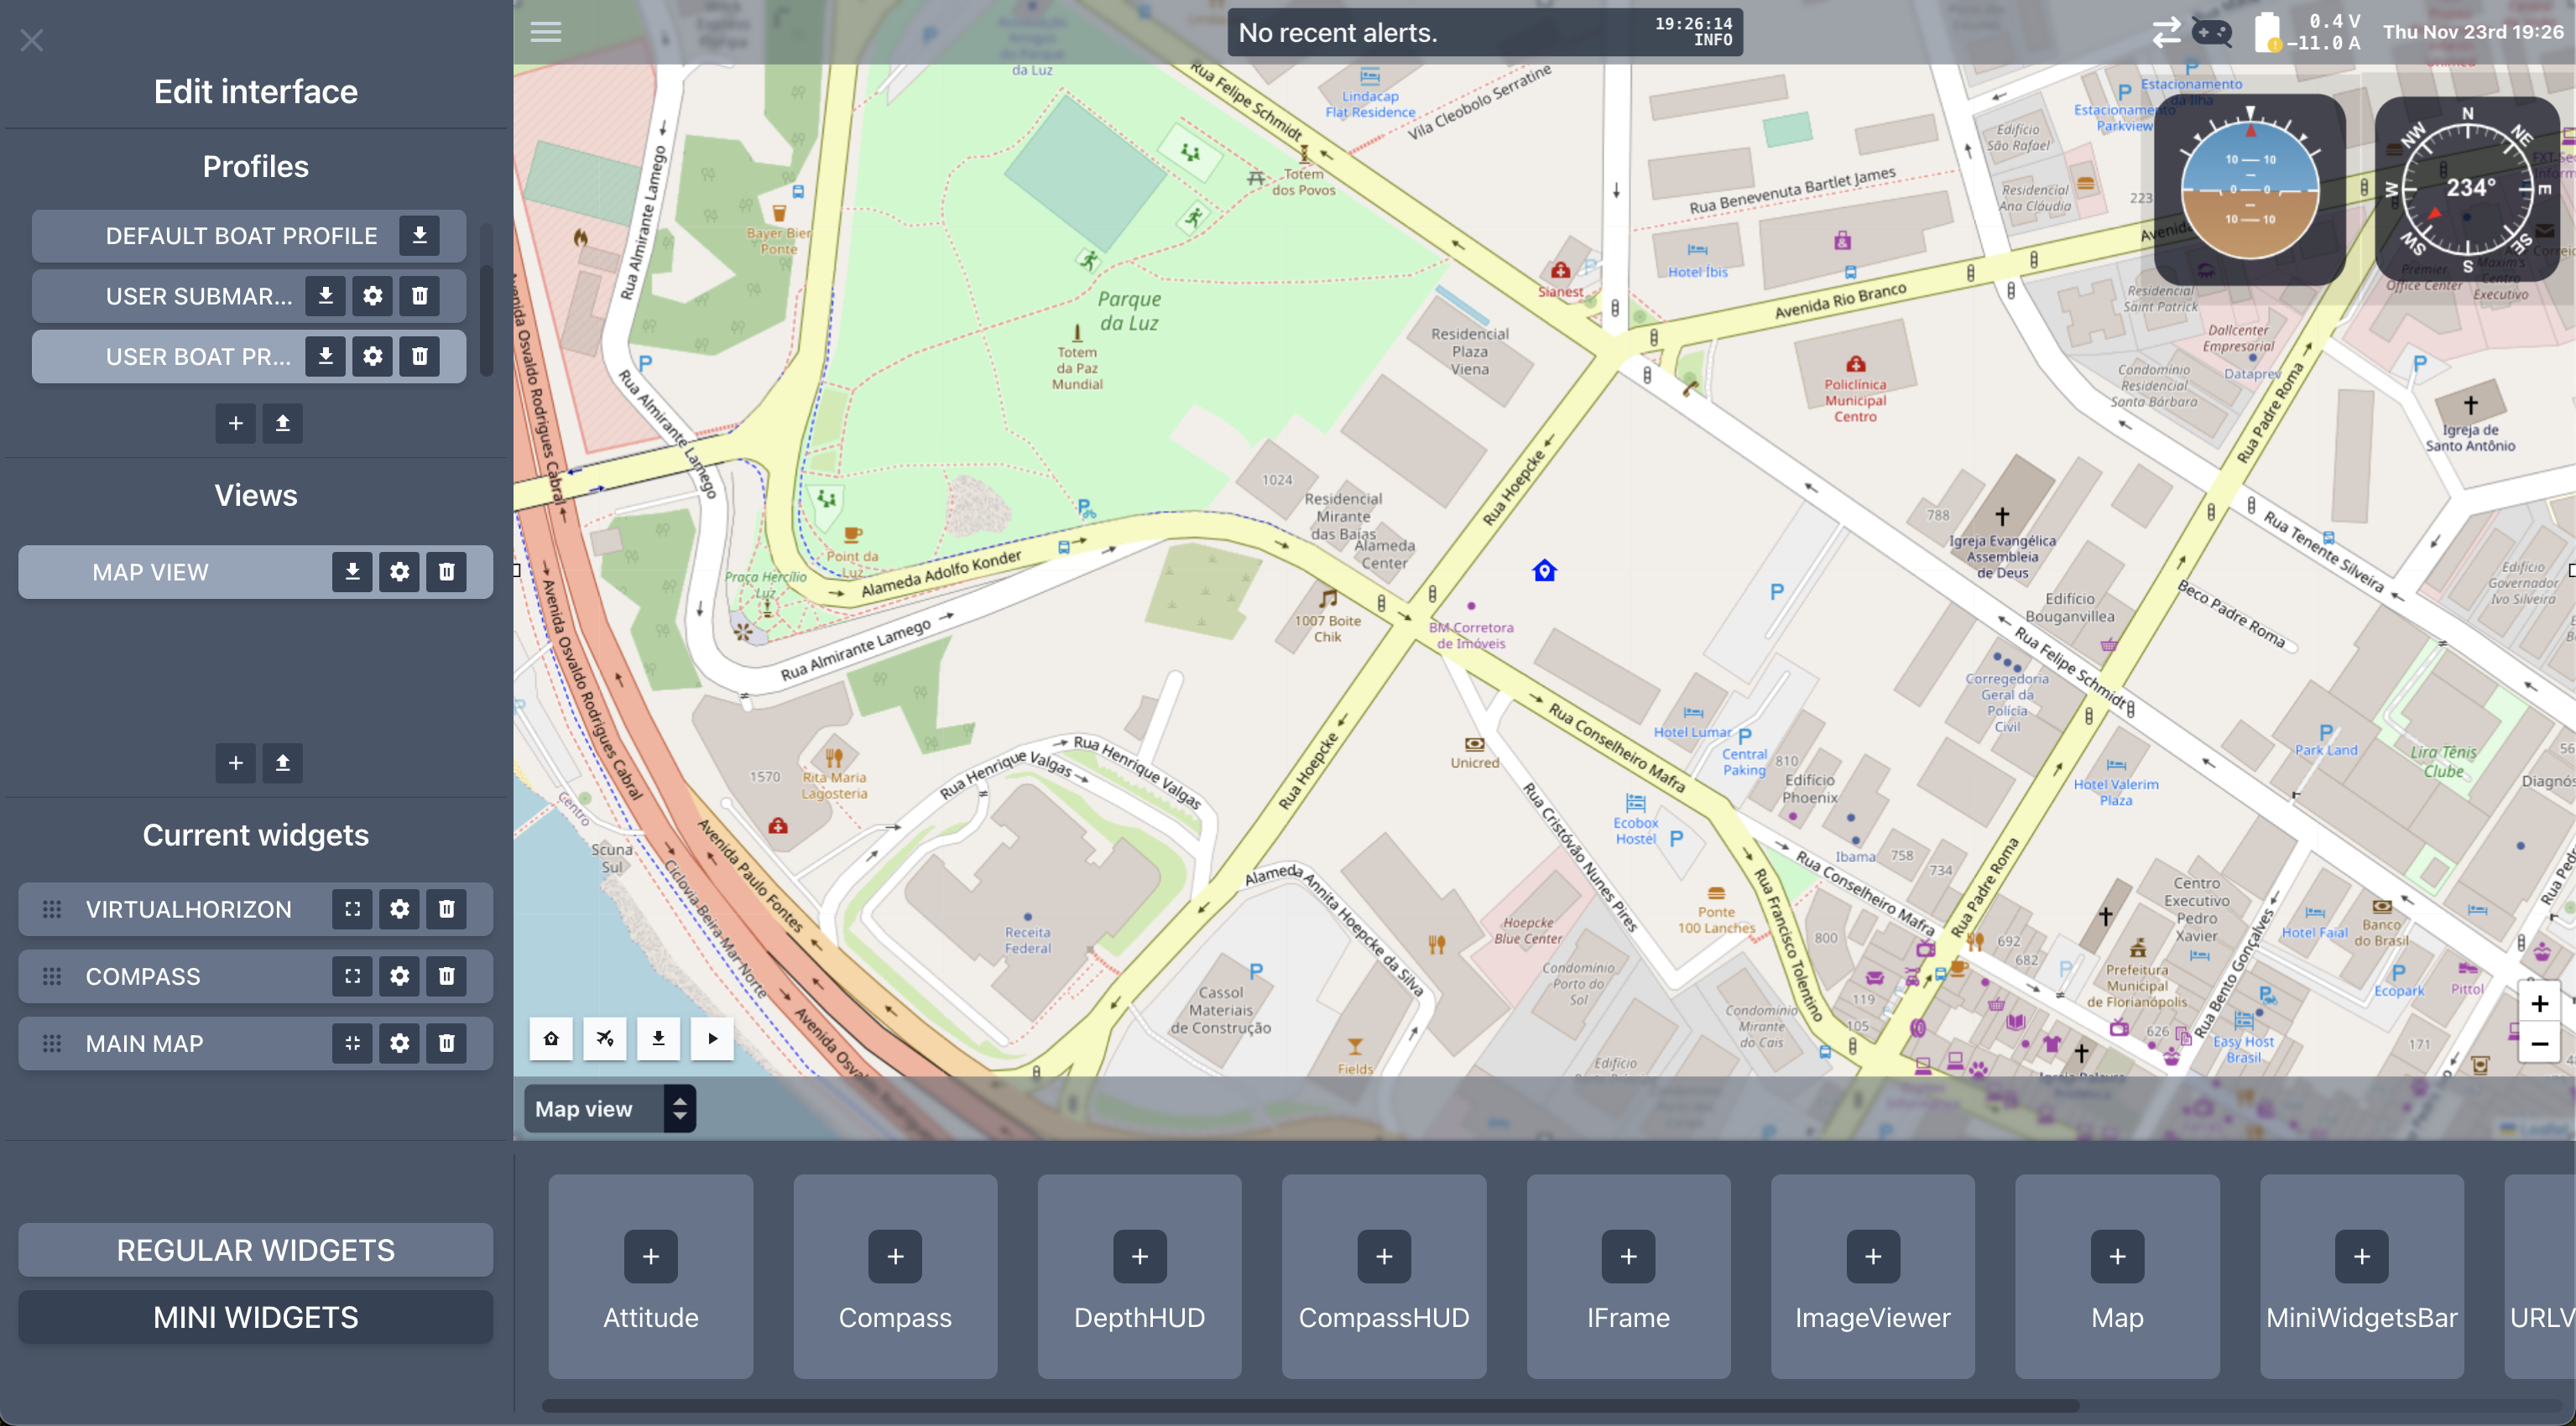
Profile Configuration
- Open edit mode (via the burger menu
- Select a custom/user profile to edit, and/or create, import, or remove profiles as desired
- Non-default profiles can be renamed by clicking on the settings cog icon
- The "Views" list shows the views that are available within the selected profile
- Selecting one of the default profiles will restore the interface to a standard one, but cannot be edited unless you download and upload it as a user profile
Views
A "view" is like a page that widgets can be displayed in. It is possible to configure multiple separate views and switch between them during operation, which is useful if you have different interface preferences for when you're performing different operations.
As an example, you may have one view tailored to general navigation, and another that's designed around inspections. The first view could then be used while getting the vehicle to the inspection site, and then the second view can be switched to once it's time to actually perform the inspection.
It is possible for different devices or browser instances to access Cockpit at the same time (e.g. using separate browser profiles, or one display in incognito mode, but currently not multiple tabs of the same browser instance), with their views configured independently. To use the same component layouts across instances you can export the desired view(s) from one and import into the other(s).
Multiple simultaneous tabs from the same browser instance will be supported in future.
Configuration
- Open edit mode via the burger menu
- Select a view to edit, and/or create or remove views as desired
- Clicking on the cog settings icon allows renaming a view, and determining whether the bottom bottom mini-widgets bar is shown or hidden/docked when Cockpit boots
- Views can be imported from an external file, or exported to a file for sharing
- The "Current widgets" list allows
- dragging the widgets in the current view to reorder which widget is on top
- This helps for use-cases like overlaying a HUD element on a video display
- removing an existing widget from the current view
- resizing a widget to fill the entire view
- dragging the widgets in the current view to reorder which widget is on top
- New widgets can be added via the bottom section
- Clicking on a regular widget adds it to the view, after which it can be positioned and resized as desired
- Mini widgets have fixed sizes, but can be dragged and dropped into the desired location in the header/footer bars or in a custom mini widget bar
- The selector in the bottom left can be used to choose between editing regular or mini widgets
- Some widgets can be configured, by clicking the cog settings icon in the "Current widgets" list
- There are currently cog icons for all widgets, so if you click a cog icon and nothing happens it means that widget is not configurable
Widgets
There are several types of widgets available, and in future it will be possible to create, import, and use custom widgets as well.
Regular Widgets
Attitude HUD
The attitude HUD widget displays the vehicle's pitch and roll as a heads-up display overlay:
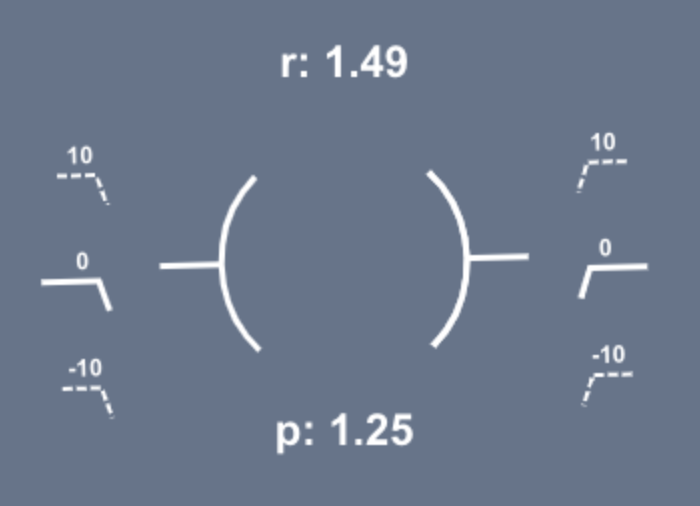
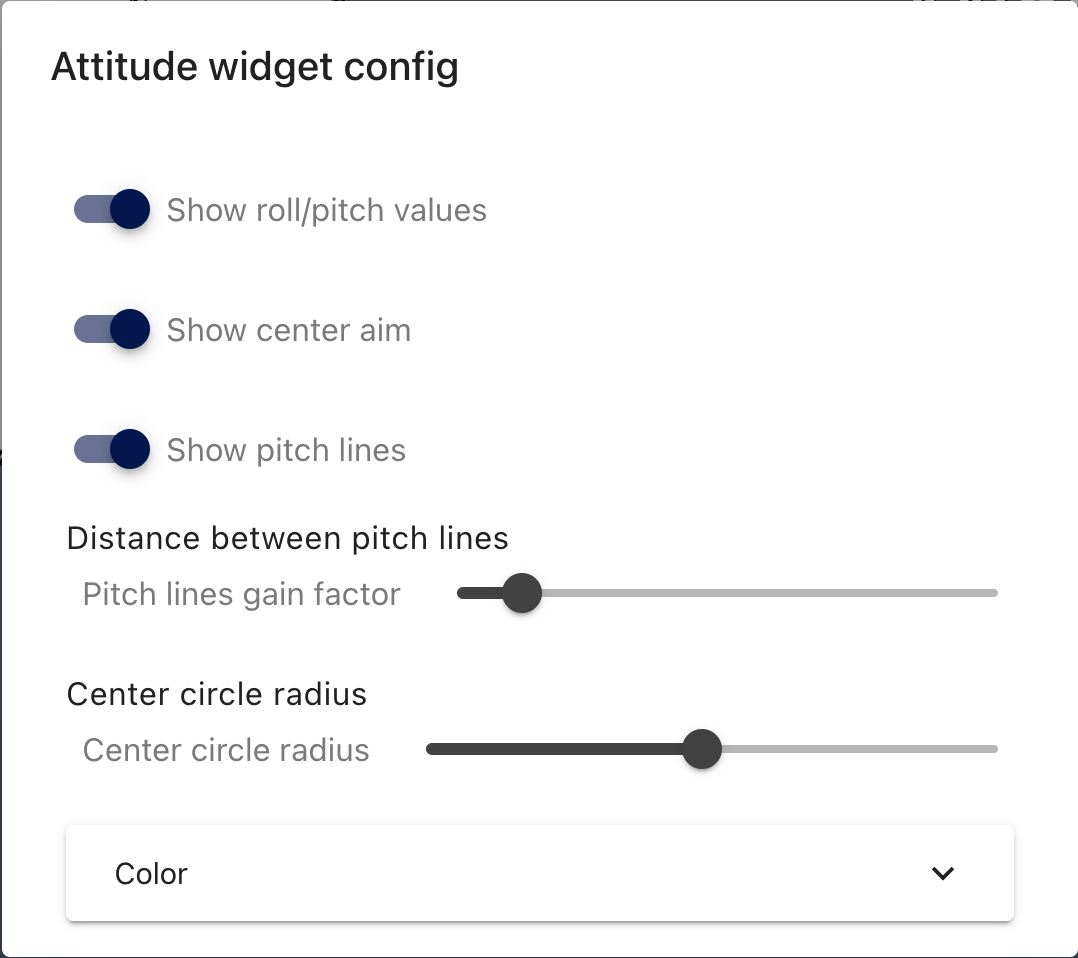
It is possible to configure which components get displayed, as well as the line colour:
Virtual Horizon
The virtual horizon widget displays the vehicle's pitch and roll as though on the gauge in a plane:

It is most useful for guided and/or autonomous control, where the main display is of the vehicle's position.
Compass
The compass widget displays the vehicle's orientation as though looking at a compass in your hand:
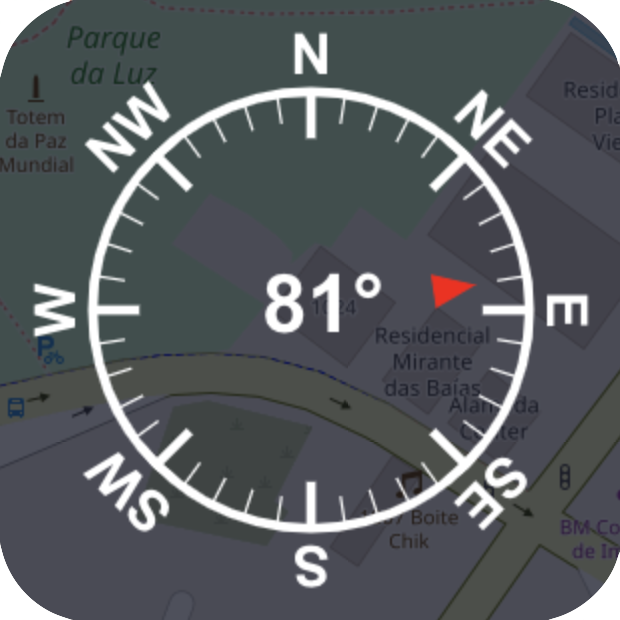
It is most useful for guided and/or autonomous control, where the main display is of the vehicle's position.
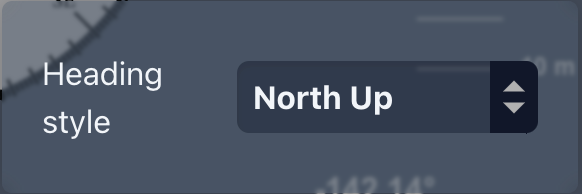
It is possible to configure the vertical direction to be fixed to North ("North-up") or to the vehicle's forwards direction ("head-up").
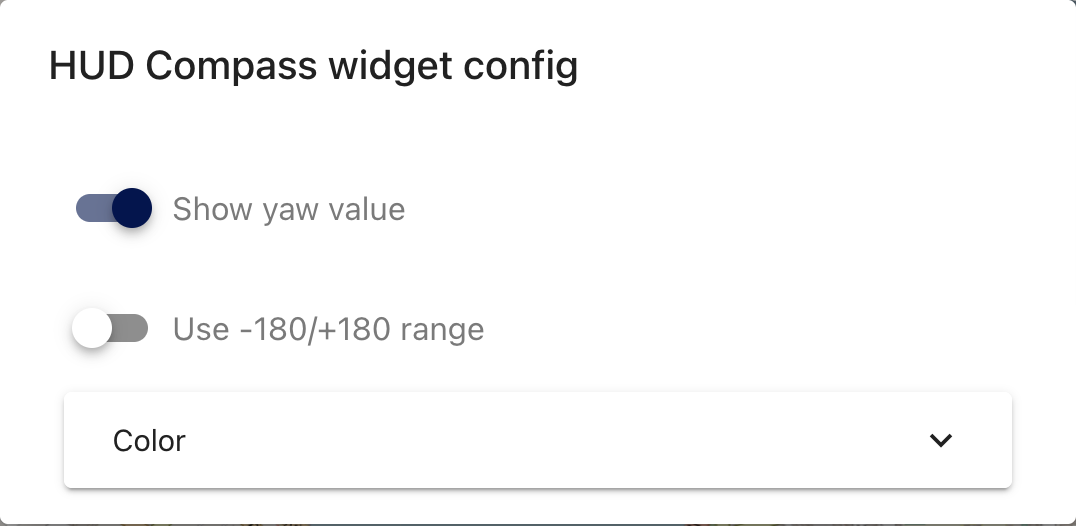
Compass HUD
The compass HUD is a first-person compass view, as though inside a compass and looking in the direction the vehicle is pointing (its heading):

It is possible to configure whether the exact heading angle is shown, whether to use a -180 to +180° range (default is 0 to 360°), and the colour of the lines:
Depth HUD
The depth HUD indicates the vehicle's current depth as determined by its external pressure sensor:
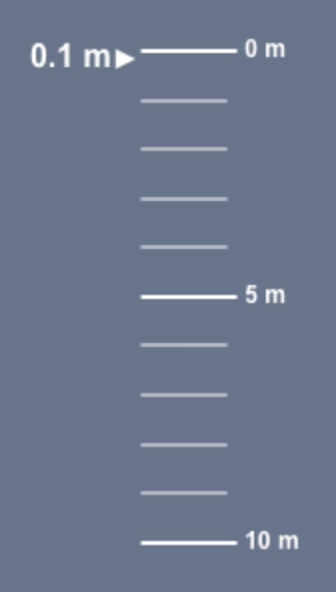
This is primarily useful for underwater vehicles.
Configuration determines whether the exact depth value is shown, and the colour of the lines:

IFrame
The iframe widget provides an inline frame that can display another HTML page within the Cockpit interface. This is particularly useful for showing the interfaces and displays of BlueOS Extensions (e.g. for a sonar viewer):
Configuration determines the URL to fetch the page from, as well as the overall transparency of the iframe:
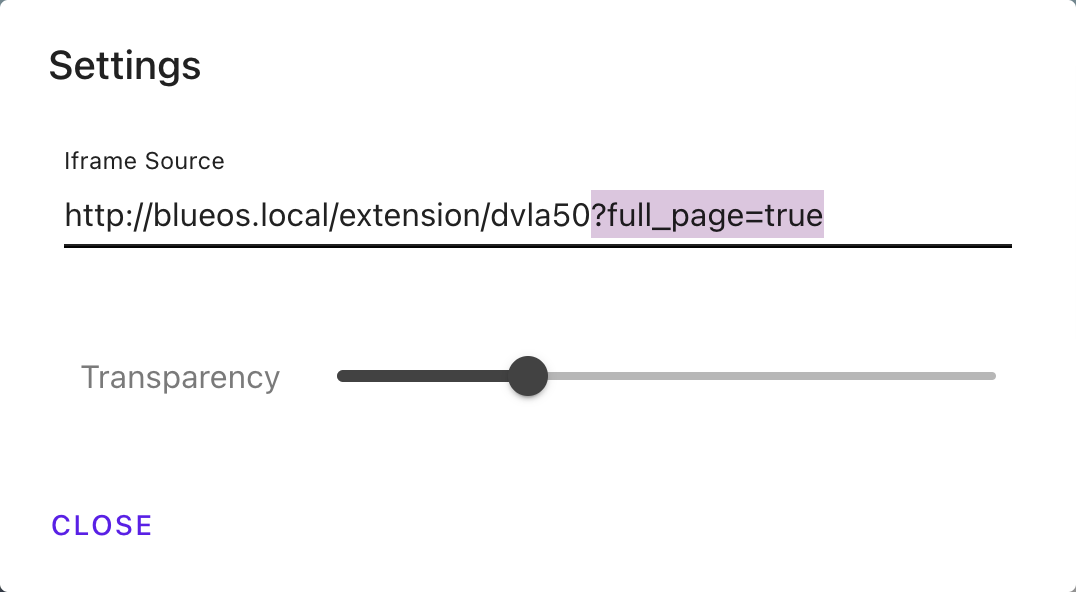
Image Viewer
The image viewer widget shows an image that is accessible to the control station computer via its network.
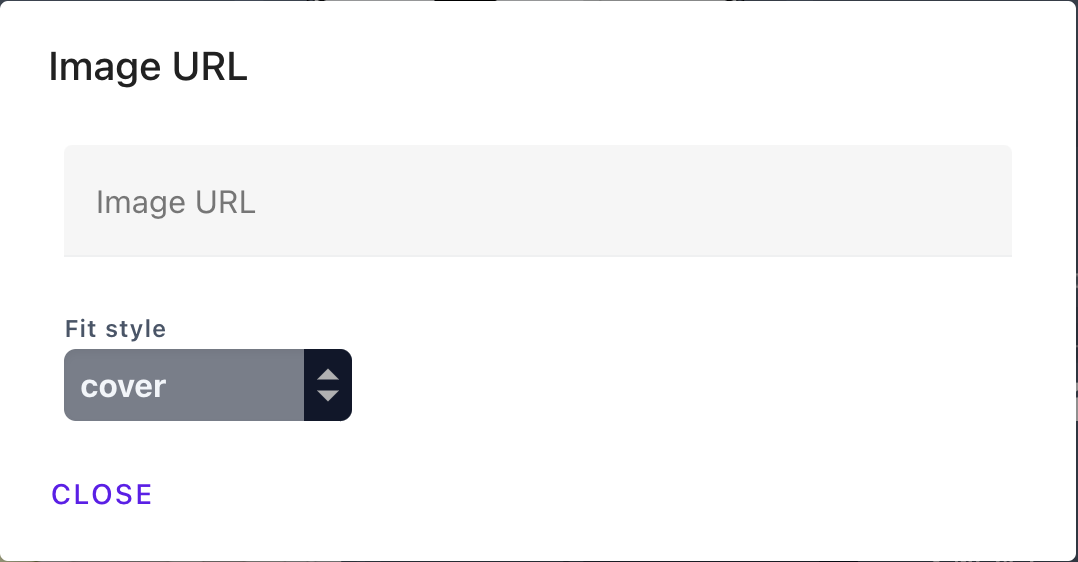
Images from the internet can be included (e.g. a logo for branding) as long as the computer has internet access when Cockpit is started.
This is most useful for images hosted on the local network, and was designed to display the output of a self-replacing mjpeg like from an ESP32-Cam. It could also display images hosted by a BlueOS Extension.
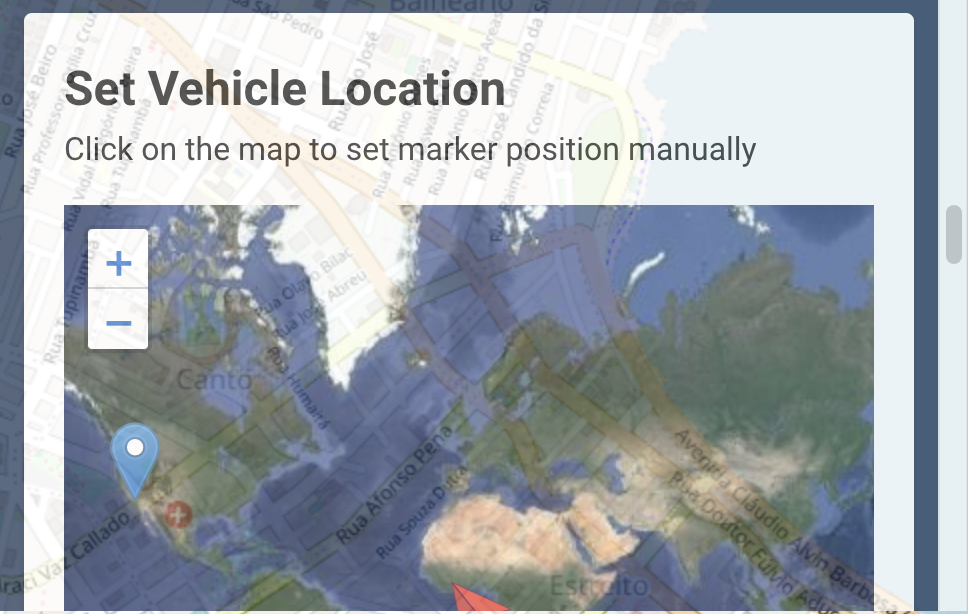
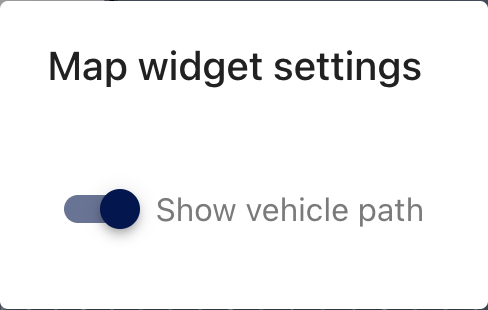
Map
For vehicles with a positioning system, the map widget displays the registered home location and the vehicle's current position, with an option to track the vehicle's path over time.
There are buttons to
- move the map to follow the registered 'home' location
- this may move around if the control station computer is on a boat
- move the map to follow the vehicle's current position
- download the current mission from the vehicle, and display it on the map
- execute the mission that is on the vehicle
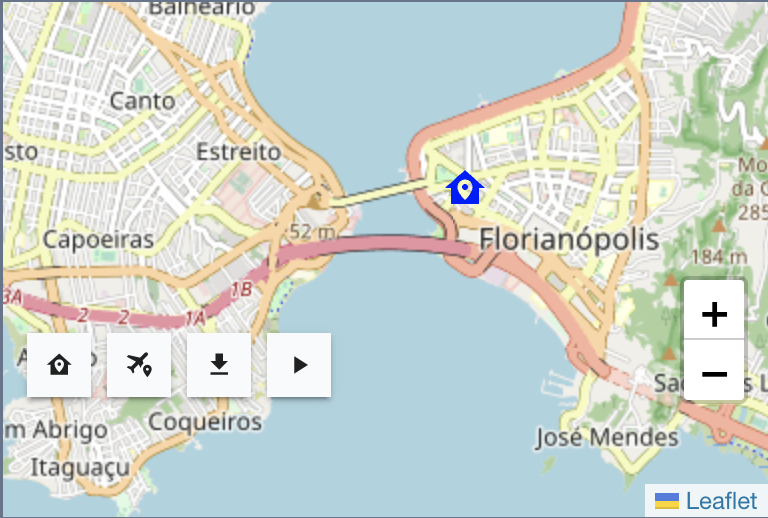
In future it will be possible to set the current vehicle position, and click to guide the vehicle to new positions.
Video Player
The video player widget displays an available WebRTC video stream. BlueOS uses the MAVLink Camera Manager to automatically create a WebRTC stream for applicable video streams.
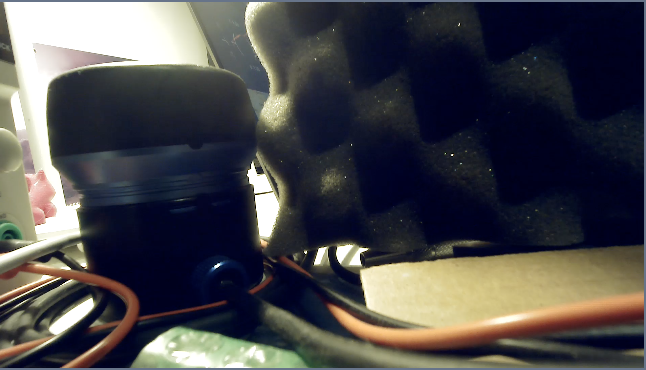
Multiple video widgets can be added to display different video streams.
Configuration allows selecting which video stream to display, flipping the stream image, and choosing how the frames should fit within the widget:
- cover: maintains the video aspect ratio, but expands the frames to fully cover the widget, and crops off the sides or top+bottom if they extend beyond the widget boundaries
- fill: stretches the frames so that all sides are against the corresponding widget boundary
- contain: maintains the video aspect ratio, but shrinks the frames to fully fit inside the widget, adding transparent padding at the sides / above+below as necessary
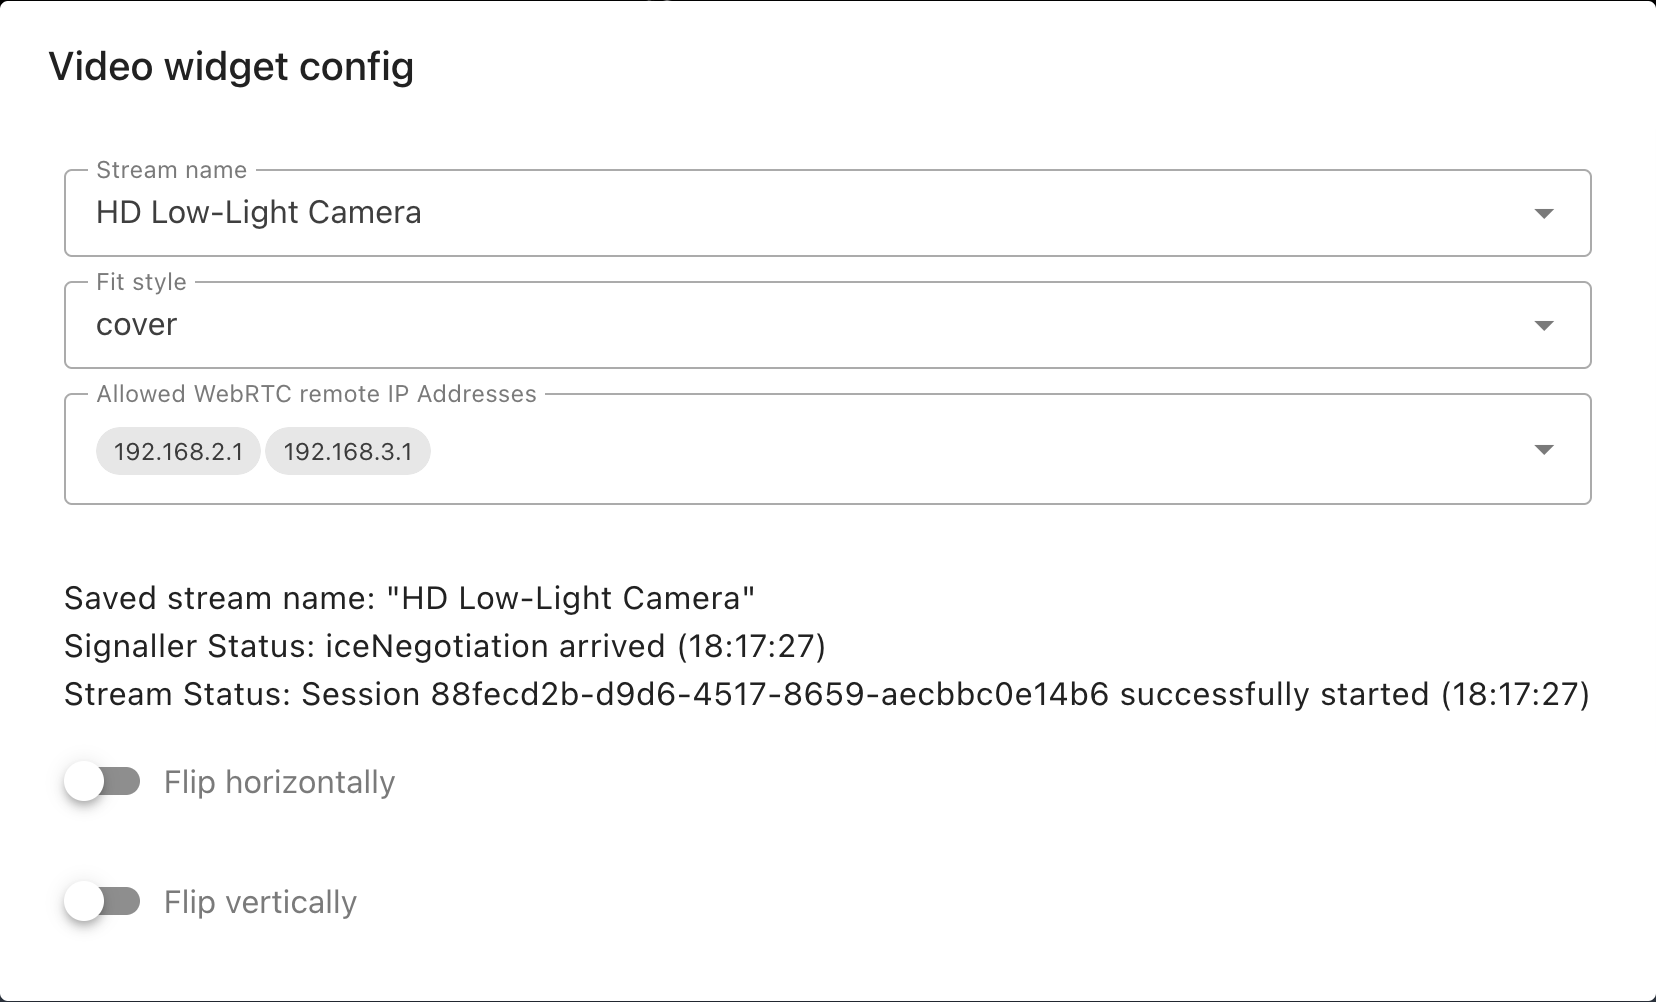
It is also possible to select the video source IP, which is recommended especially if there are multiple available connection routes (e.g. if there is a wired route through a tether, as well as a wireless connection, you should select the tether IP and remove the wireless one to avoid video stuttering from transmission over wifi).
Video recording is possible using a mini widget, and directly records the incoming stream (not the scaled and cropped display of the widget).
URL Video Player
The URL video player widget displays a video from a URL. This is useful for testing IP cameras that are not being redirected via BlueOS, but can also be used to display online videos if that is for some reason relevant.

Configuration allows selecting which URL to stream a video from, as well as options for whether to play the video automatically, whether it should loop when complete, whether it should play sound or be muted, whether playback controls should be exposed, and choosing how the video frames should fit within the widget (as described in Video Player.

Mini Widget Bar
The mini widget bar widget is a rectangular container for storing mini widgets.
Mini Widgets
Mini widgets are small, generally single-function widgets that can be drag-positioned in the header bar, footer bar, or any mini widget bar.
They are editable by selecting "Mini Widgets" in the bottom left corner of edit mode, then either dragging a new mini-widget (from those available along the bottom of the screen) into a mini-widget bar, or configuring or removing one from the "current mini-widgets" list in the bottom left corner.
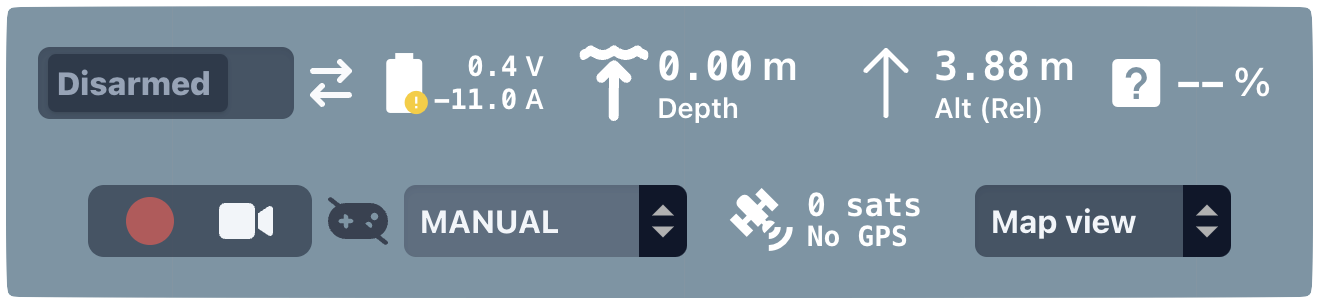
The current options include
- Arm/Disarm toggle switch
- Vehicle connection status indicator
- Power / battery indicator
- Depth indicator
- (Relative) altitude indicator
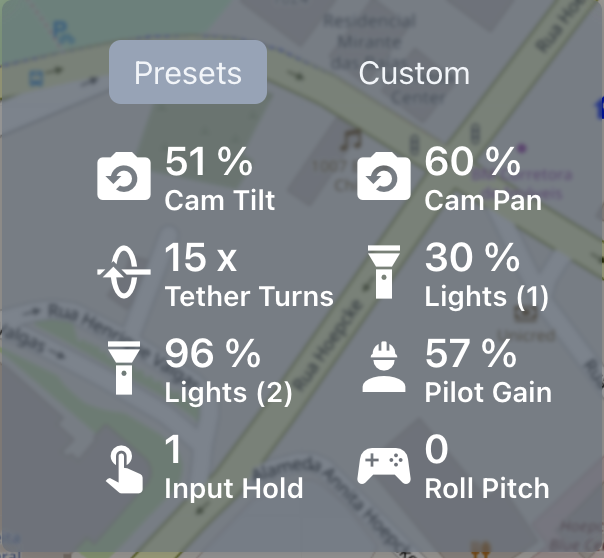
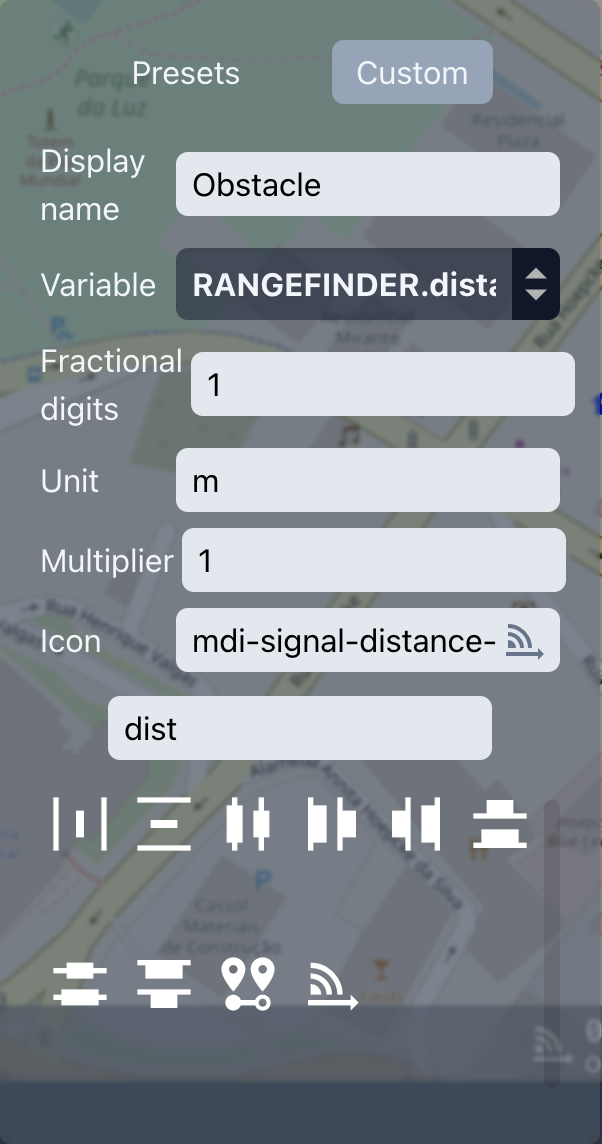
- Very generic indicator
- configuring this allows selecting which vehicle variable to track, out of any that have been received so far (including custom ones)
- only variables coming from Ardupilot vehicles are currently supported
- available variables include those comming from
NAMED_VALUE_FLOAT/INTmessages as well as any variable that is inside any MAVLink message - several pre-made presets are available for usage with common variables
- it is also possible to specify a display unit, a value multiplier, an icon, the number of digits after the decimal place and a custom display name
- Video recorder
- allows recording one of the available WebRTC streams, or the full Cockpit tab
- recording occurs in the browser of the display device (not onboard the vehicle)
- this is currently stored in memory and downloaded to the device when finished, which may limit maximum time for individual recordings
- recordings are saved using the mission name and the starting timestamp
- Joystick connection status indicator
- Flight mode selector
- GPS status indicator
- View selector
Configuration
Cockpit's behaviour can be configured via the burger menu, with the following tabs:
General
Connection configuration allows specifying custom endpoint addresses for Cockpit to communicate with. When Cockpit is hosted by a vehicle running BlueOS these are usually correct by default, but if using it standalone or connecting to some external services it may be necessary to specify different addresses, and refresh the page to establish the desired connection.

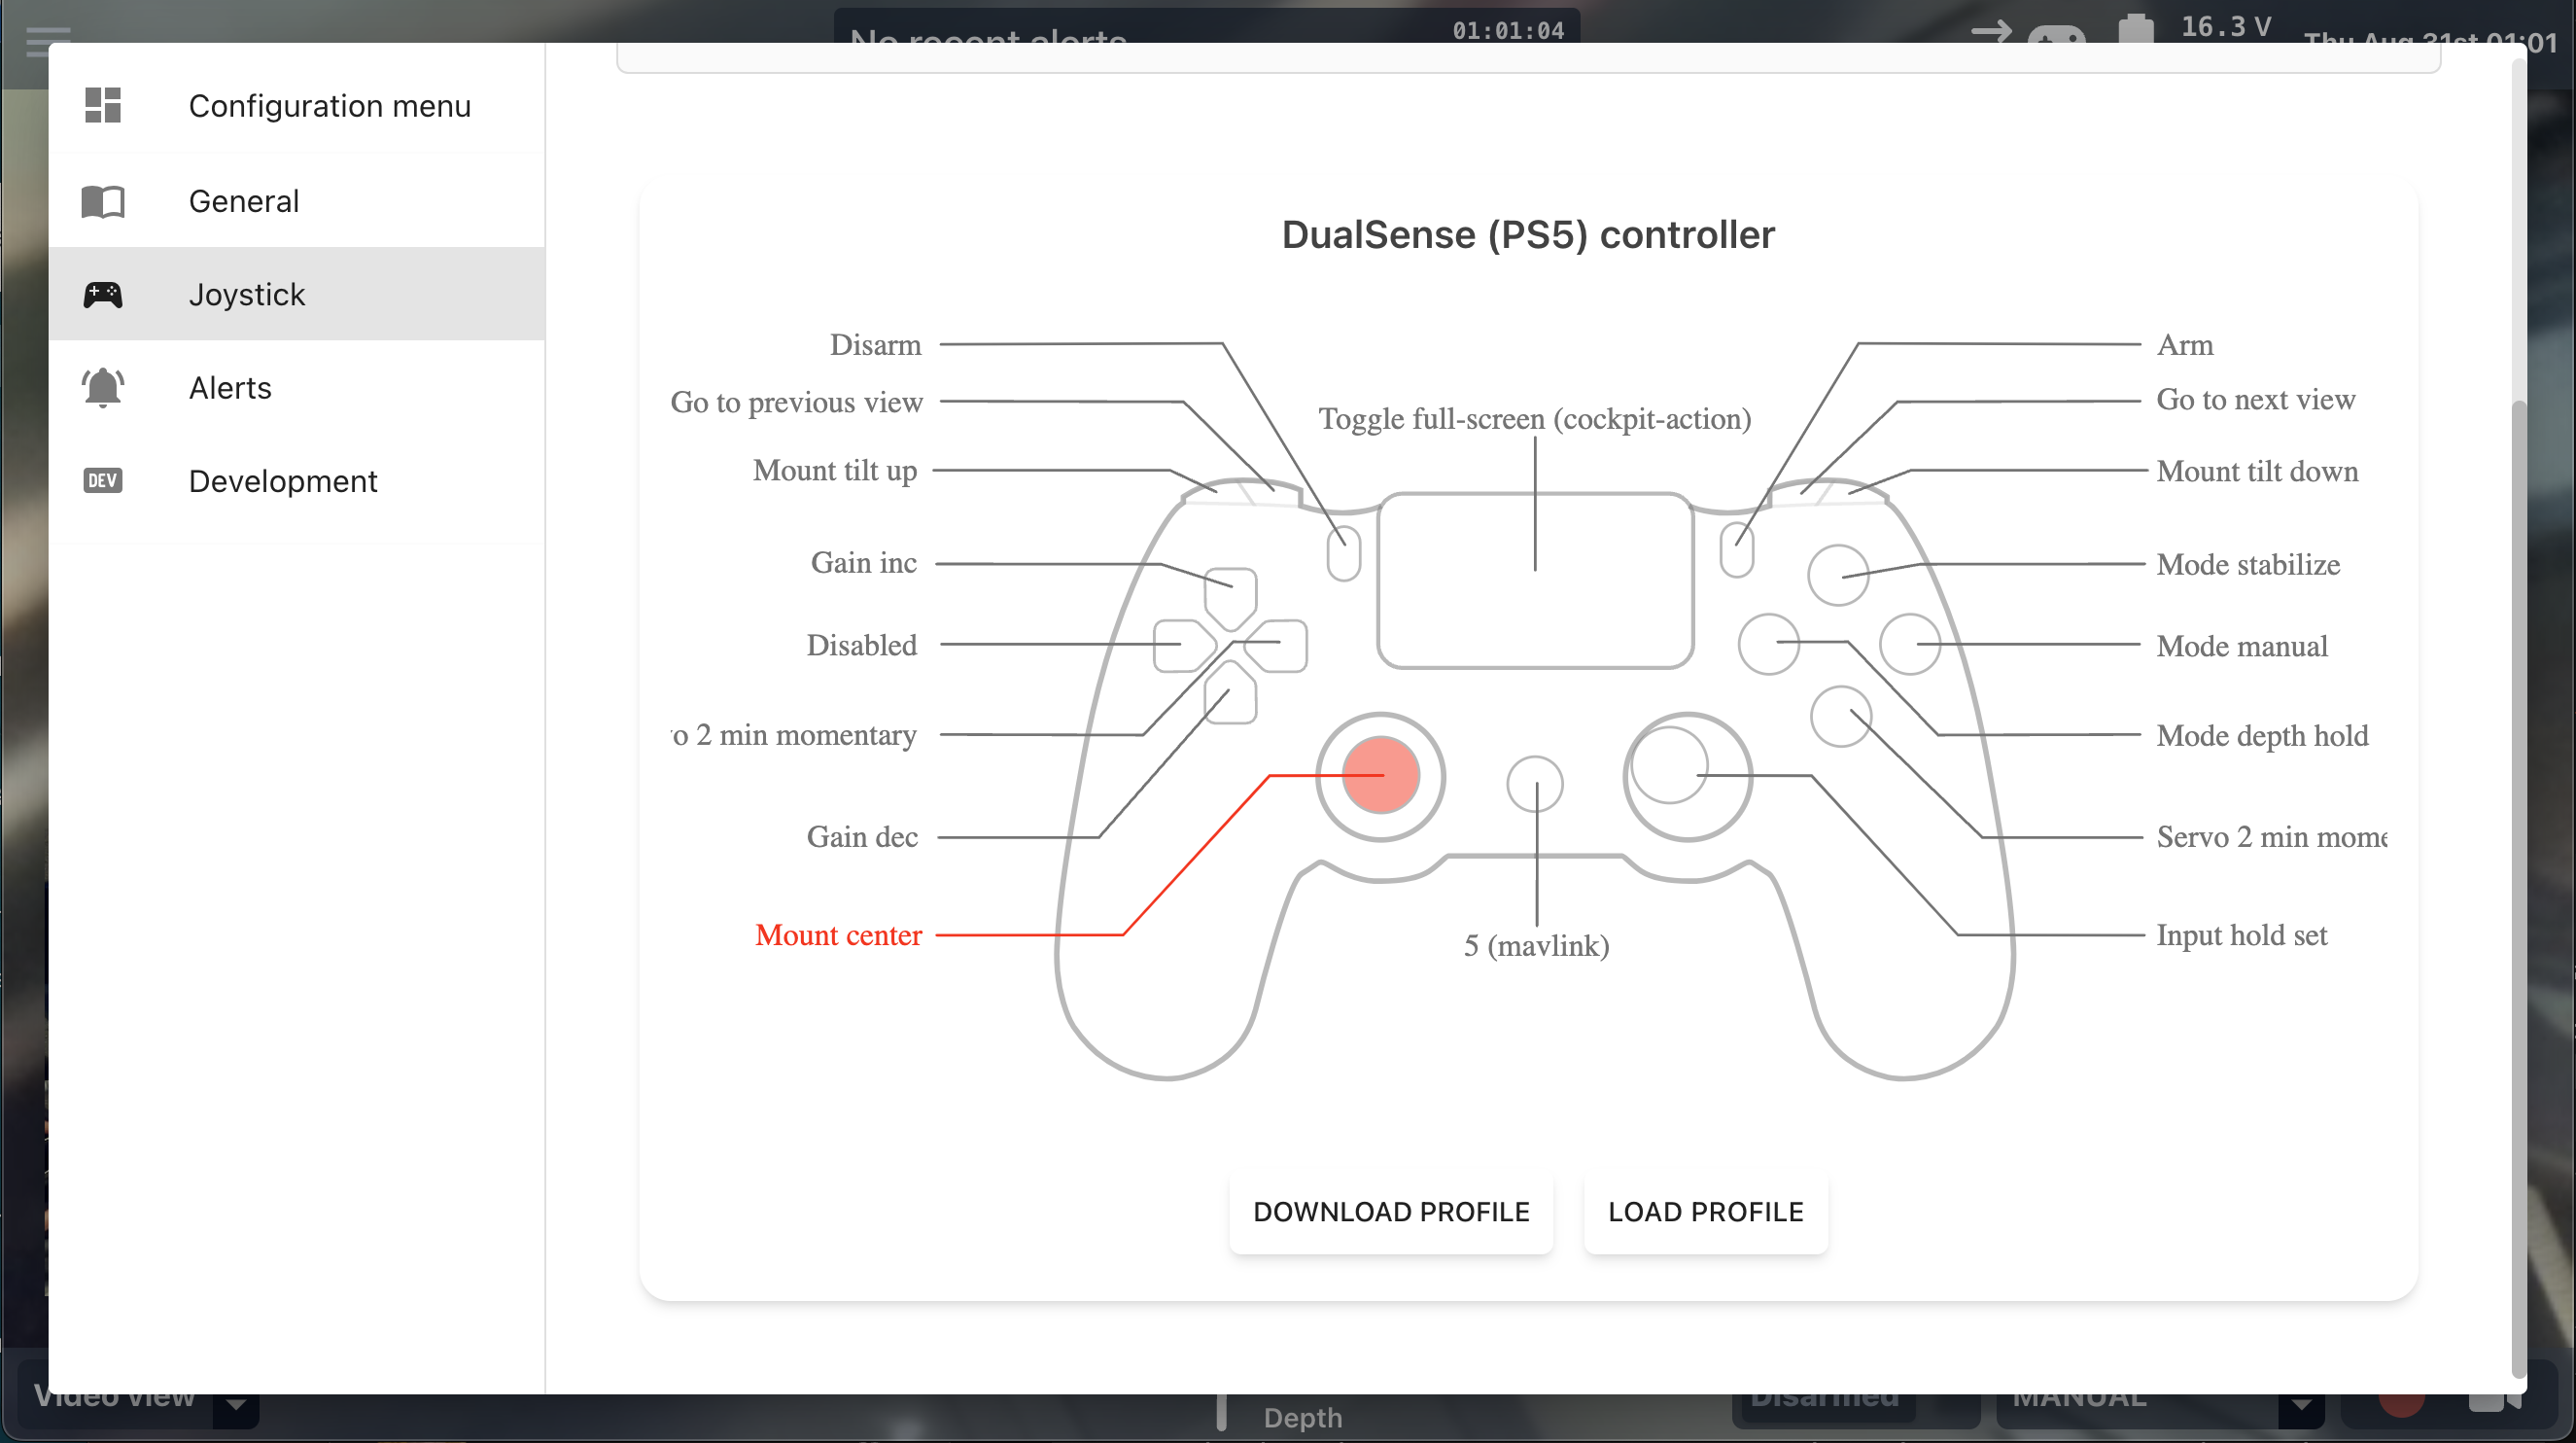
Joysticks
Cockpit is intended to work with arbitrary joystick types, and allows mapping joystick buttons and axes
to BTNn_FUNCTION
values for use in regularly sent MANUAL_CONTROL
MAVLink messages, as well as to Cockpit Actions which can send commands to the vehicle or trigger interface
events like like view switching or starting a video recording.
Support is built in for simultaneous input from multiple sources, including multiple joysticks, and by default each joystick can provide up to 8 axis ranges and 32 buttons. As some caveats,
- ArduSub only supports 16 independent buttons and 4 axis ranges in its
MANUAL_CONTROLhandling - When mapping the Z motion axis range, note that ArduSub uses 0 to +1000 for full reverse to full forwards, whereas other vehicle types use -1000 to +1000
- Cockpit can assign a button to the "Shift"
BTNn_FUNCTION, but is not currently capable of mapping a secondary "shifted" autopilot action to its other buttons- This currently needs to be set up separately, either directly using vehicle parameters, or using an alternative control station software like QGroundControl
- Cockpit is currently only capable of mapping to
BTNn_FUNCTIONvalues that have already been assigned to a button, which may need to be done in advance using parameters or QGroundControl
Adding support for a new joystick type requires providing an SVG file with particular element IDs (for function mapping, and so the elements can be dynamically filled when the corresponding button is pressed):
path_b*is used for different button numbers, numbers can currently be from 0-31- the buttons can be remapped during Cockpit configuration by clicking on the displayed button in the SVG display and clicking the "Remap" button followed by pressing the actual joystick button that matches the displayed location
path_b10/b11are currently used to denote the joystick axes- 10 indicates the left side joystick, 11 indicates the right side one
- in future there will be support for arbitrary axes and sliders
- New SVGs currently need to be added to the code, but in future will be possible to add/import dynamically
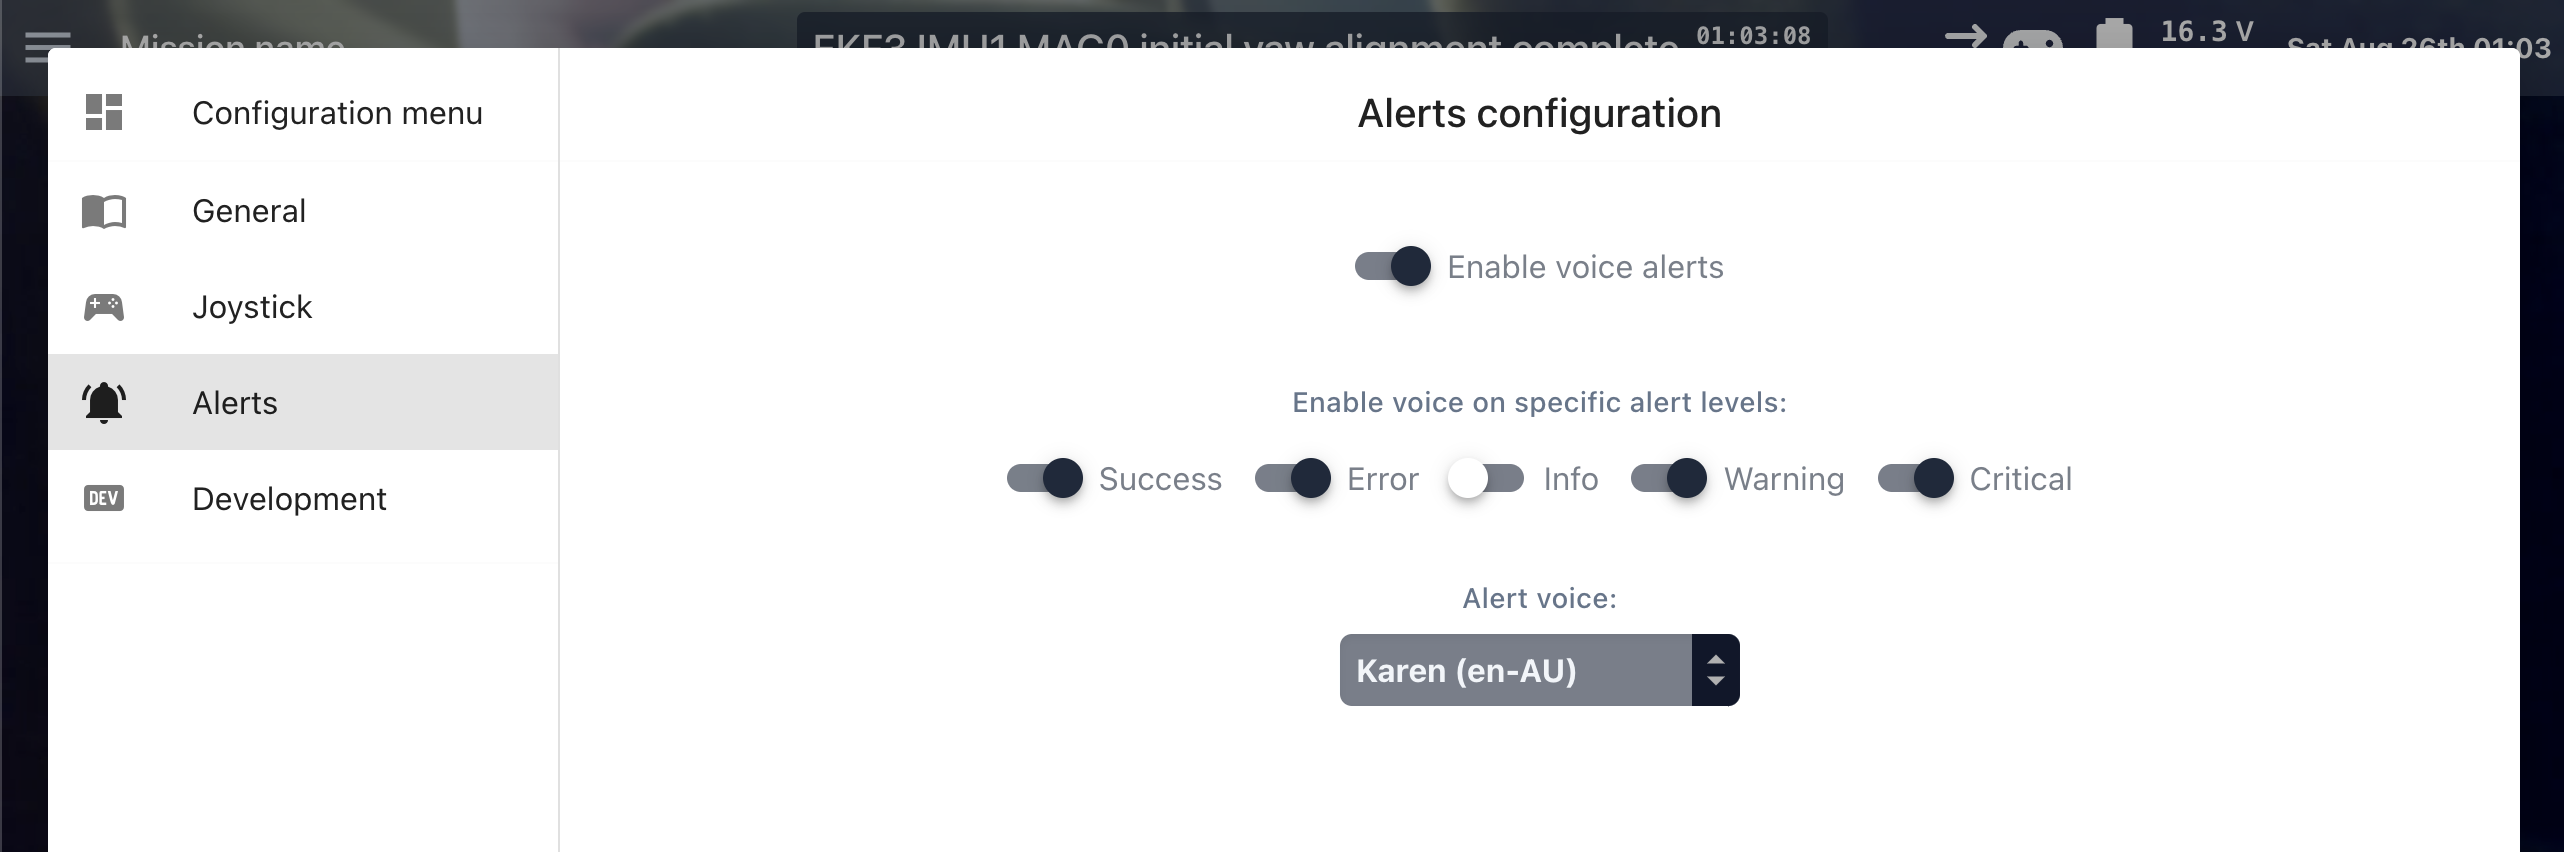
Alerts
It is possible to select the desired text-to-speech voice, as well as configure which alert severities are read out loud:
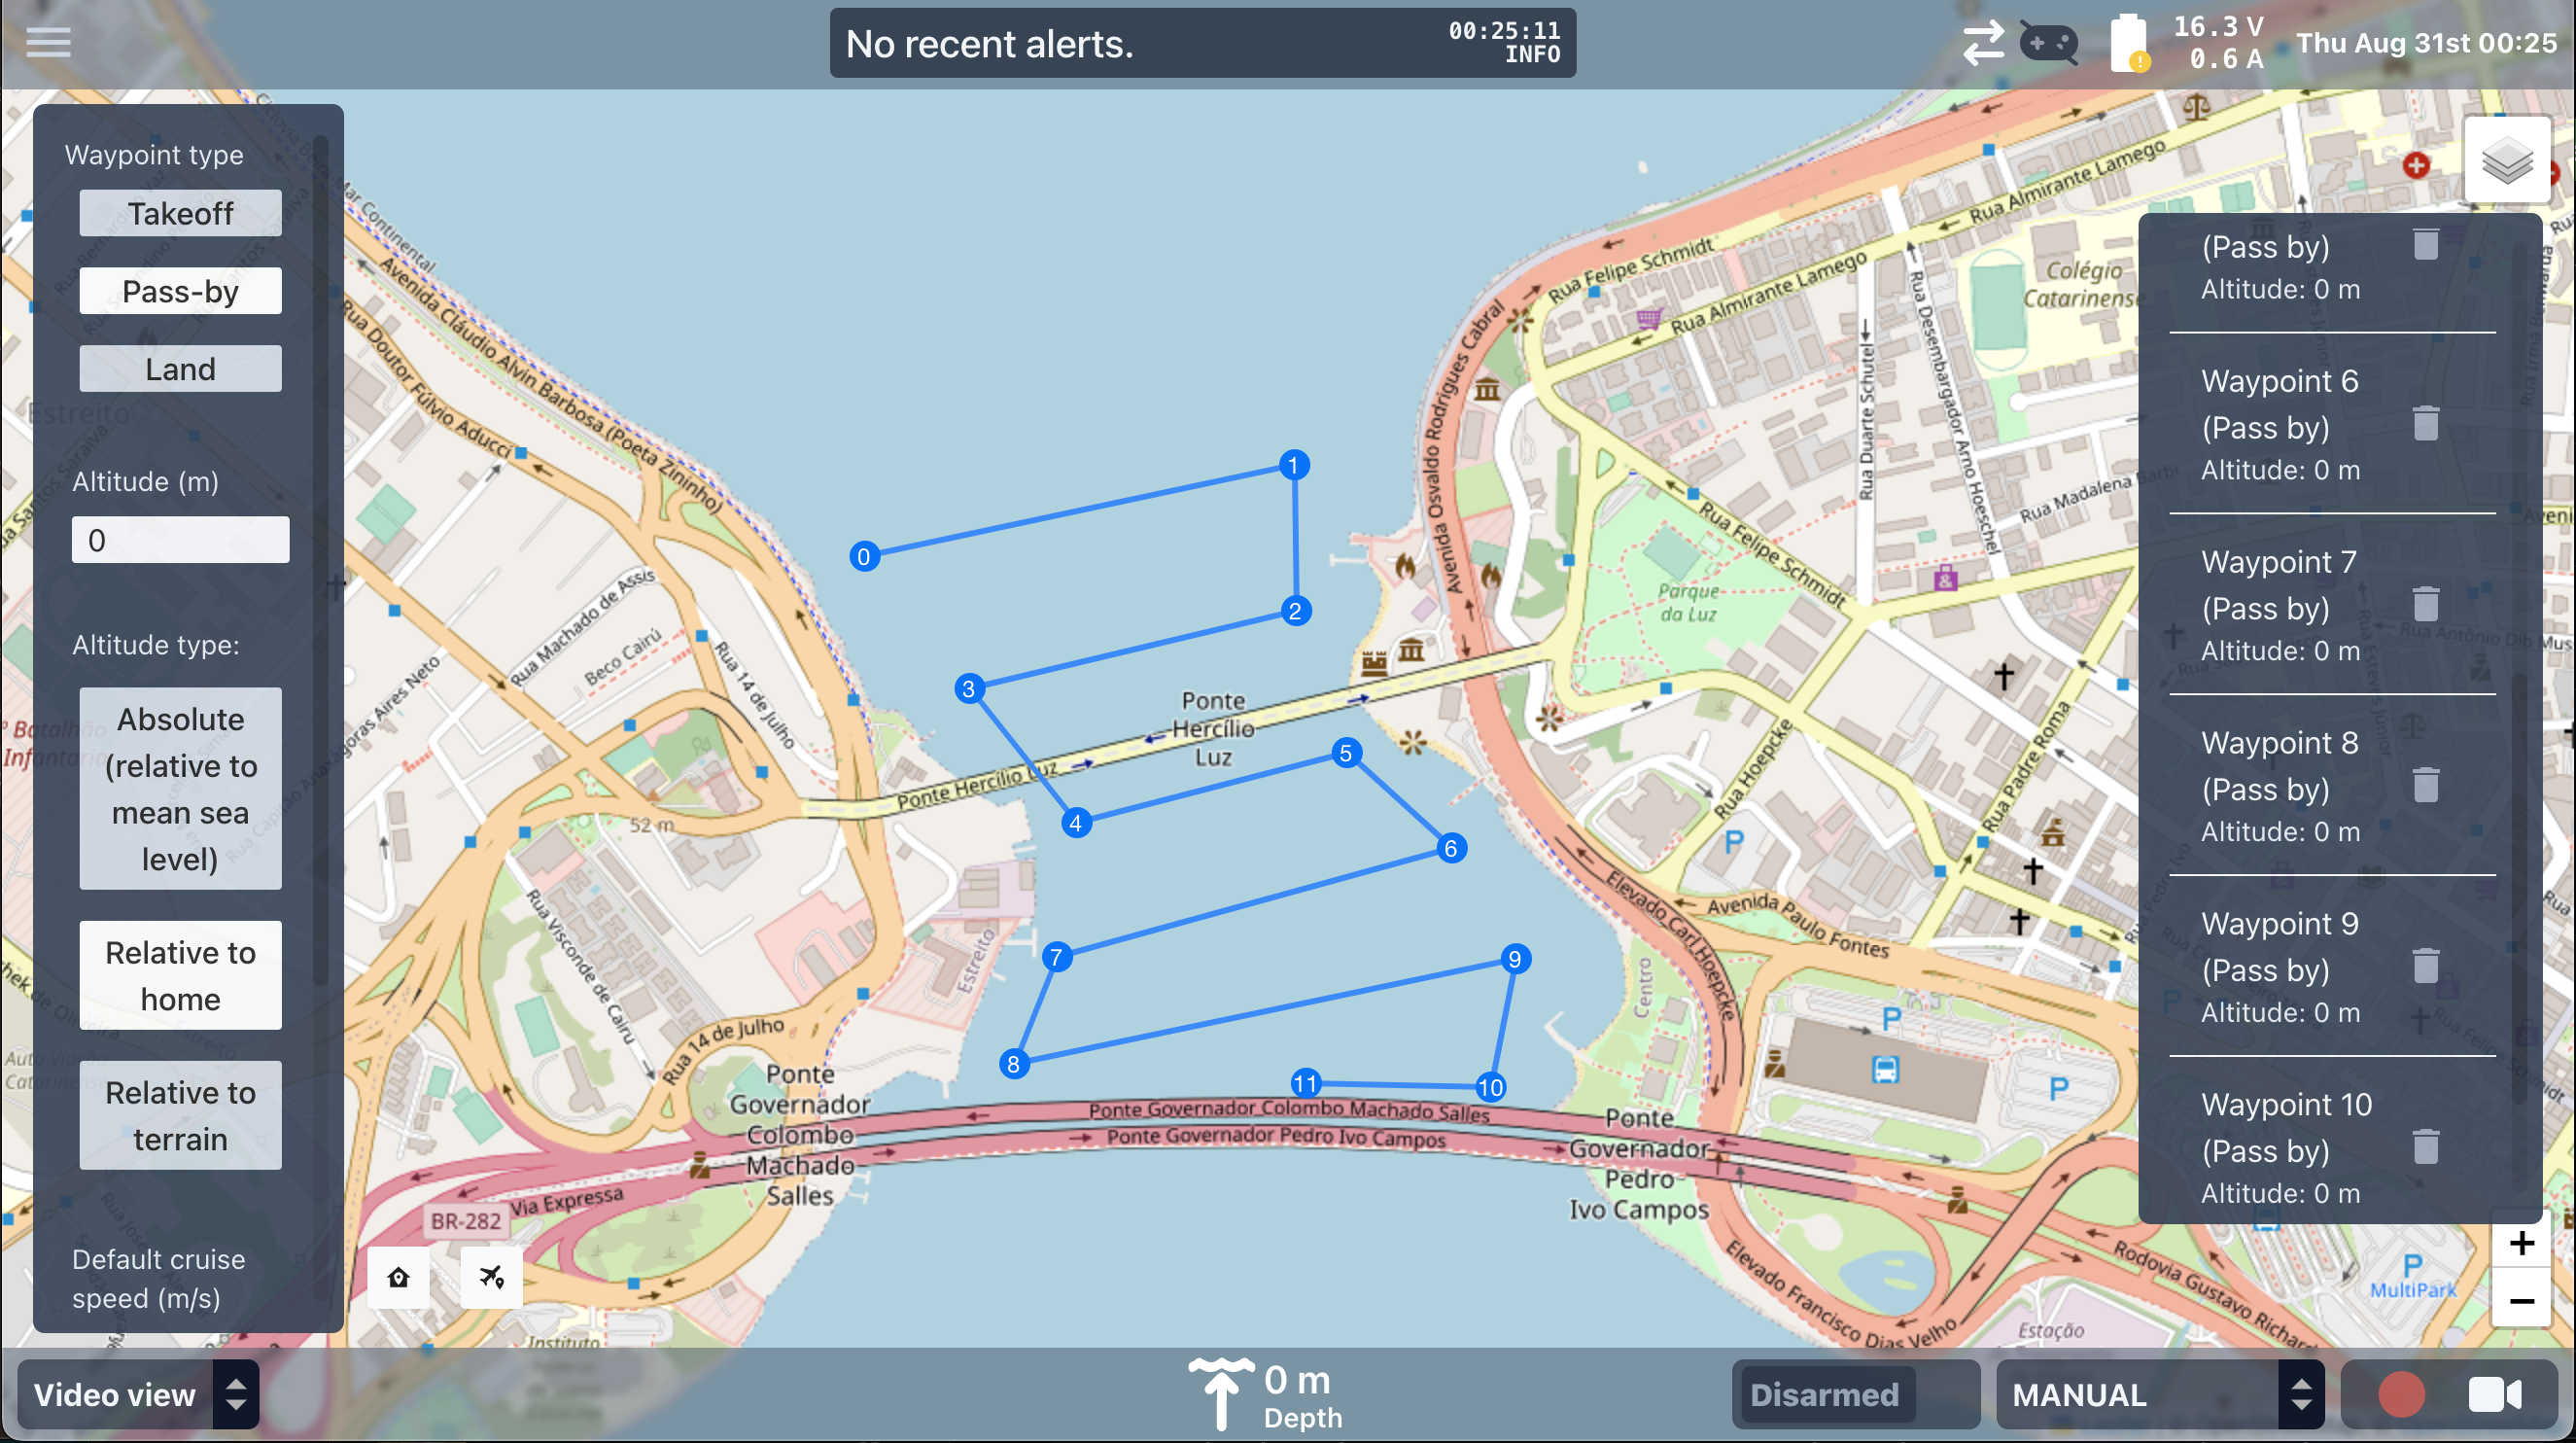
Mission Planning
- Allows planning (and saving/loading) autonomous missions
- Allows mission control