Getting Started
General Configuration
When run as a BlueOS Extension, Cockpit will automatically be configured to connect using the IP address of the connection to BlueOS.
If that address changes during operating (or if Cockpit is run as a standalone application) it may be necessary to configure the global vehicle address, MAVLink2REST address, and WebRTC signalling server address so that Cockpit knows the correct connection points for the vehicle. After address configuration it is necessary to refresh the page.
To access the configuration section, open the burger menu in the top left, and select "Configuration".

Interface Setup
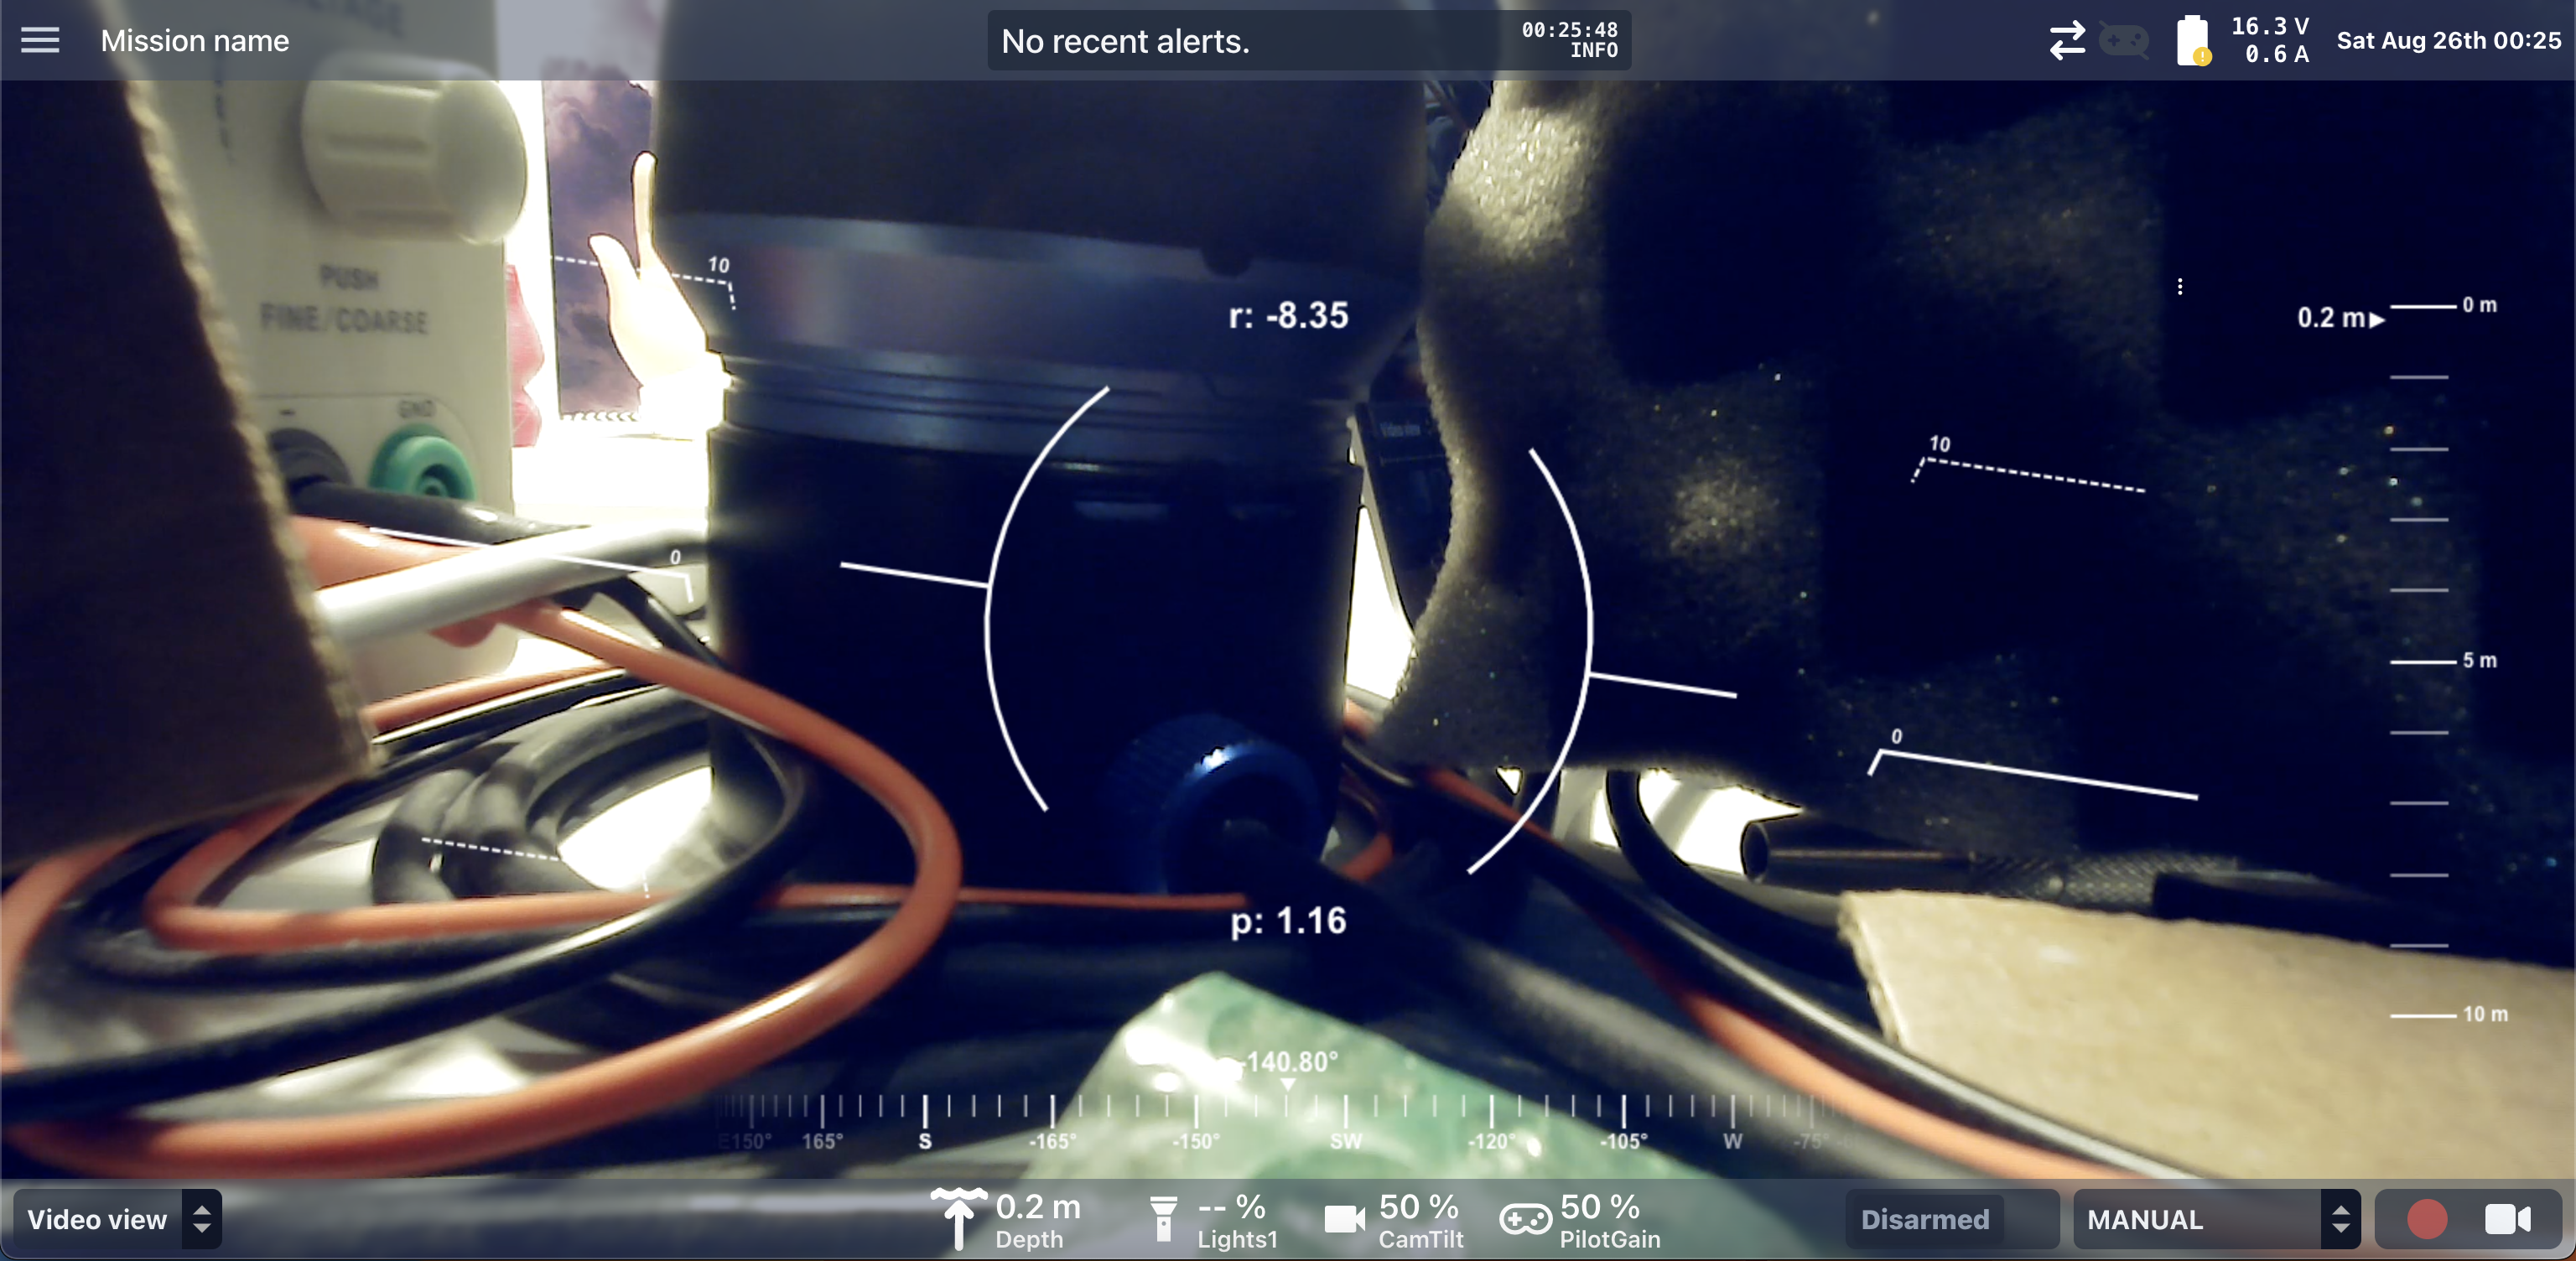
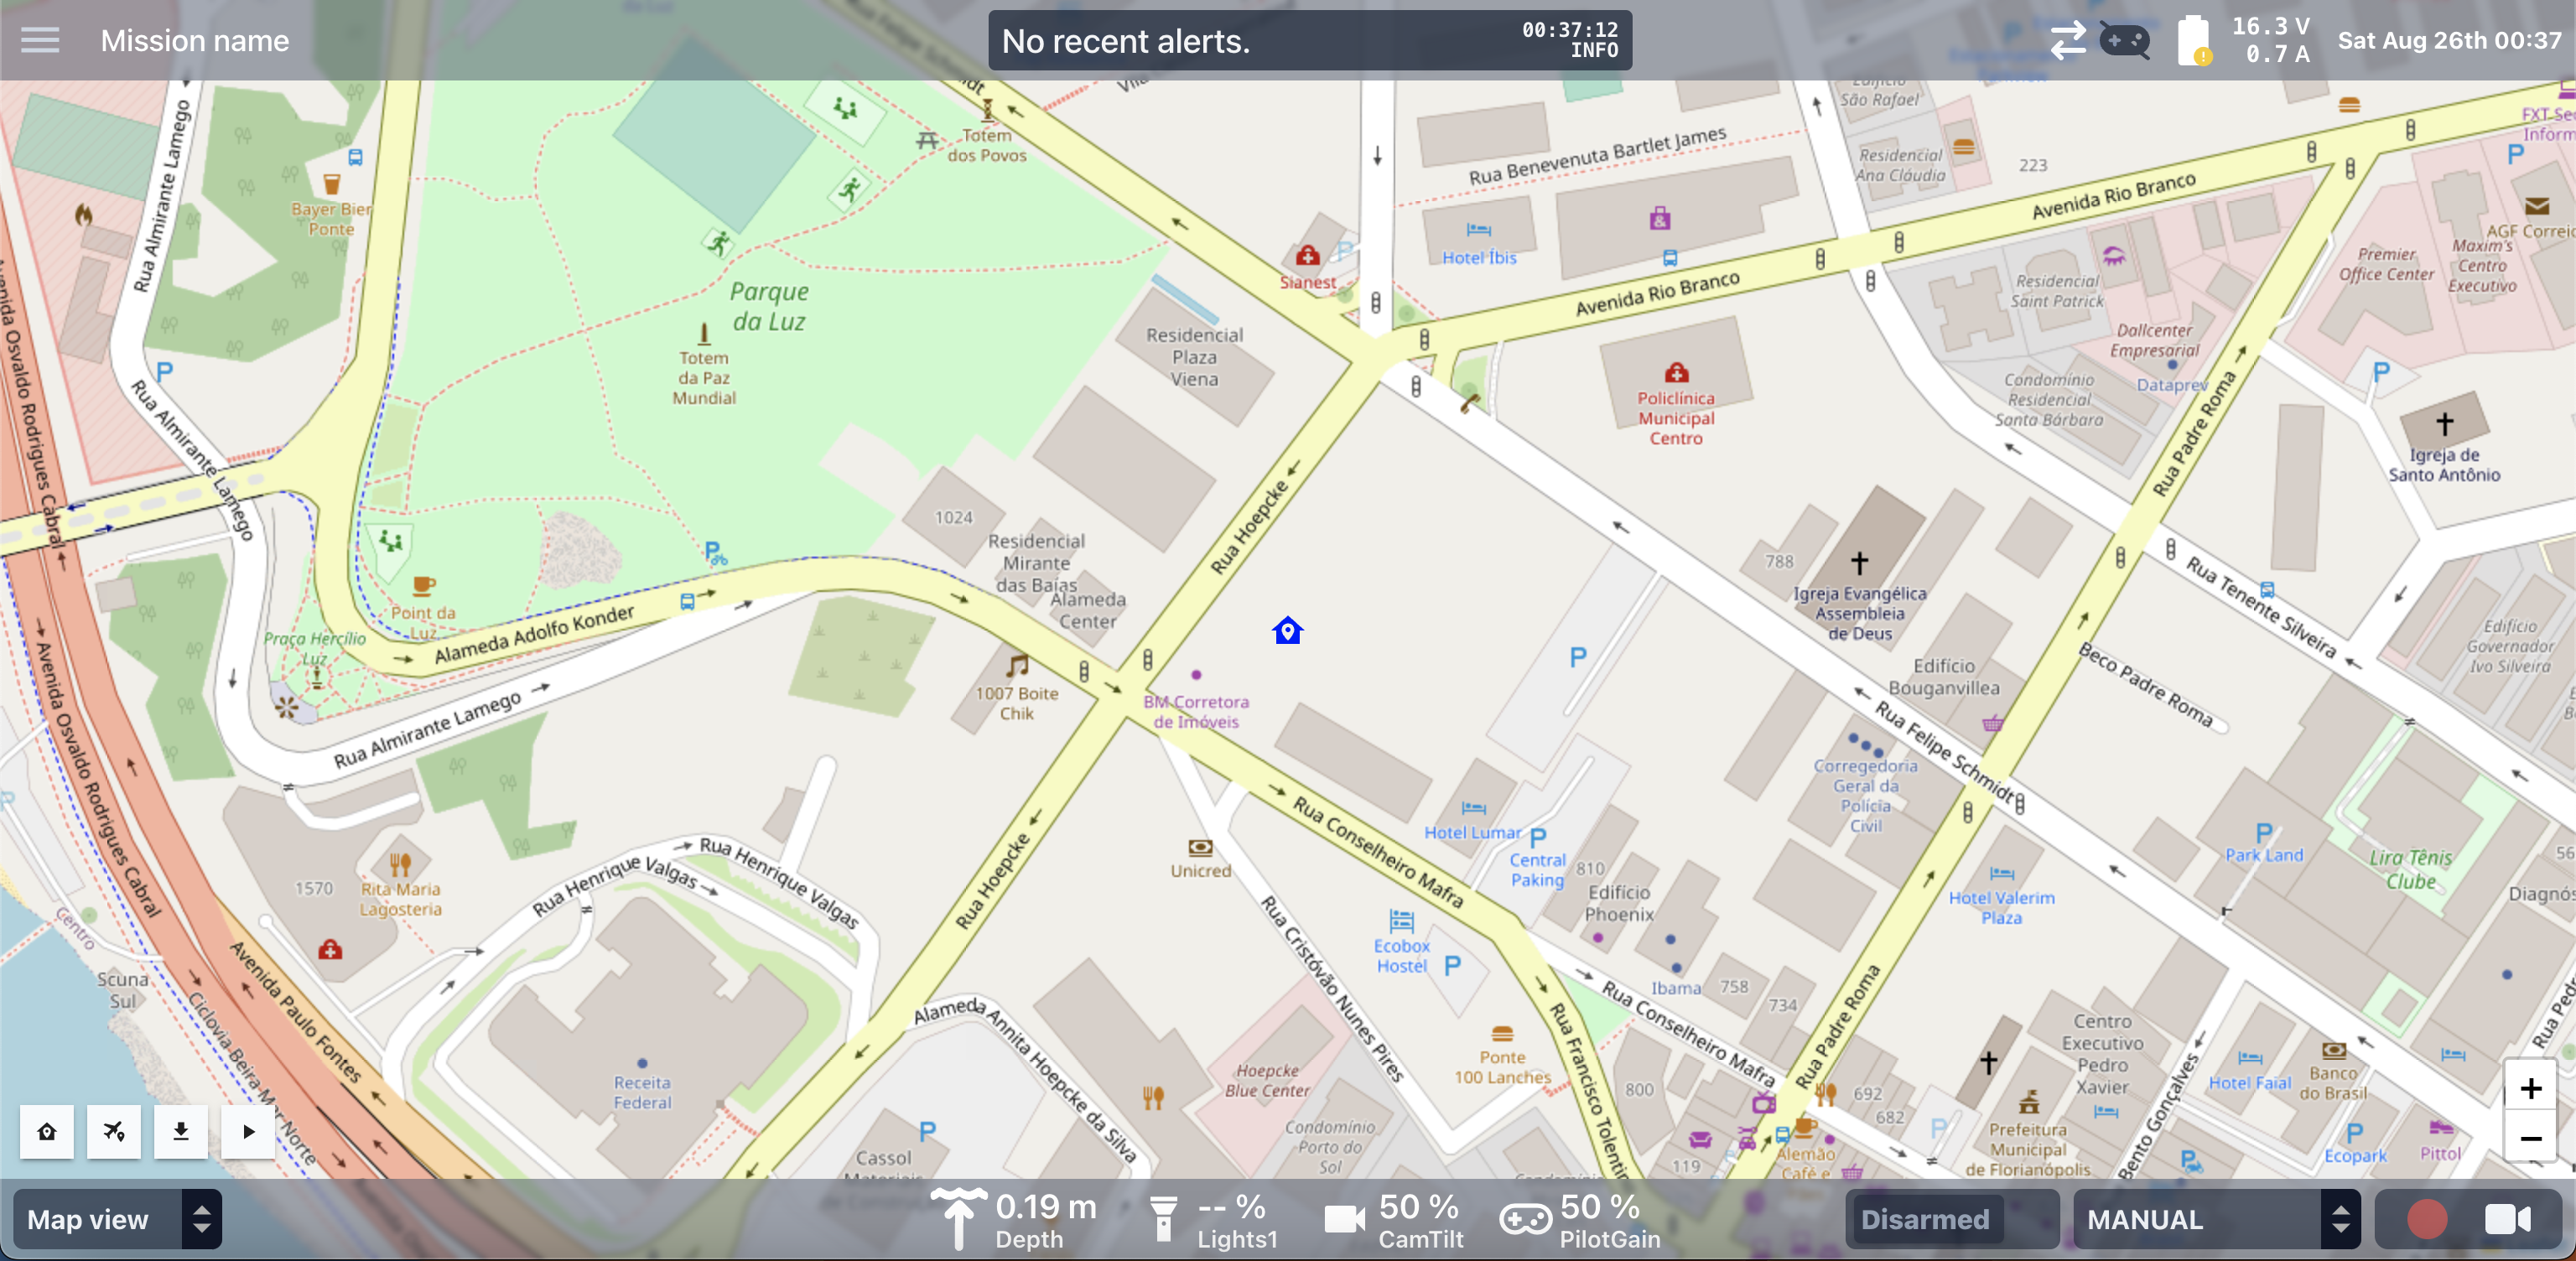
Visual Display
By default, the interface of Cockpit is set up with two views:
- Video view
- Includes a video stream, vehicle telemetry, heads-up display (HUD) overlay elements, status updates, and flight mode selection
- Most useful for first-person control of a vehicle like an ROV, copter, or plane
- Map view
- Includes a map, vehicle telemetry, status updates, and flight mode selection
- Most useful for mission planning and remote monitoring of vehicles with a positioning system and/or autonomous control
Primary widgets that support configuration can be configured by clicking on the icon in their top right corner. Mini-widgets can be configured by clicking anywhere on the widget.
The available views (including widget size and placement) can be configured as described in the advanced usage documentation.
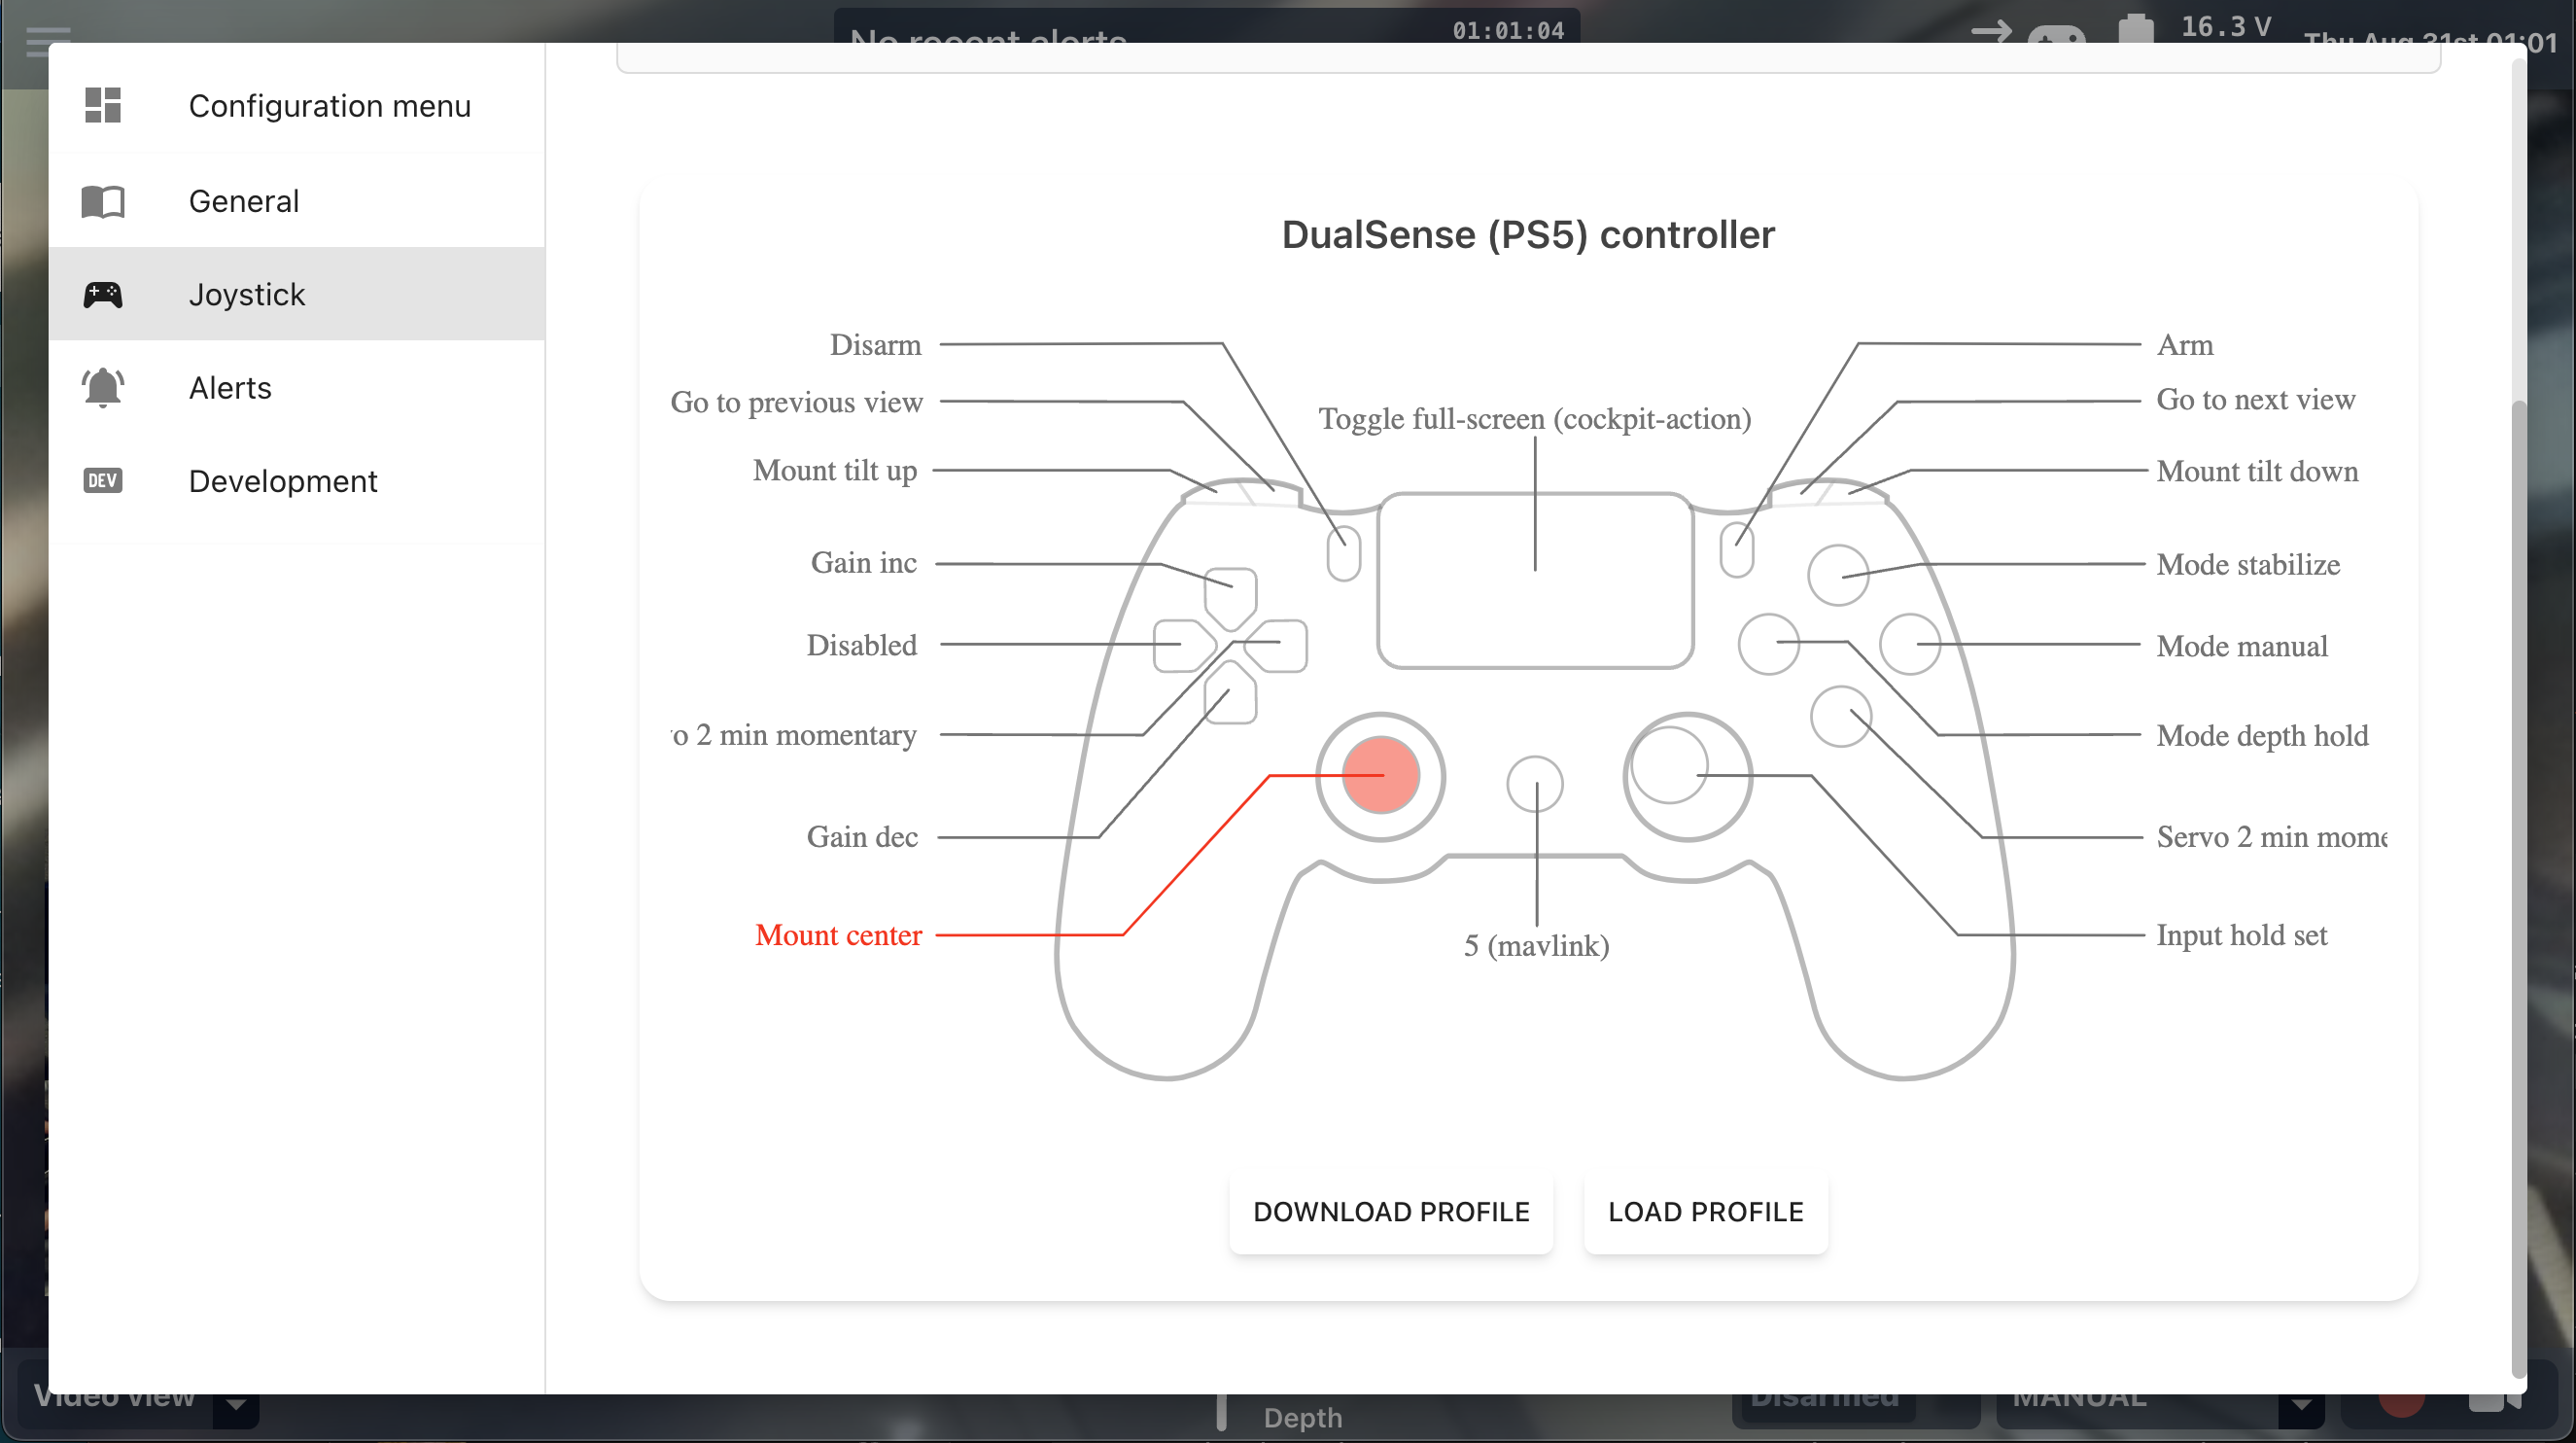
Joystick Configuration
For vehicles controlled via a joystick, button and axis mappings can be set by clicking the burger menu (top left), then selecting "Configuration" and navigating to the Joystick tab.
Vehicle Setup
Cockpit does not currently contain vehicle configuration or calibration functionalities. It is recommended to perform these in advance, using either the BlueOS web interface and/or an alternative control station software like QGroundControl.
It is possible to switch between Mission Planning and Flight displays via the burger menu in the top left.